
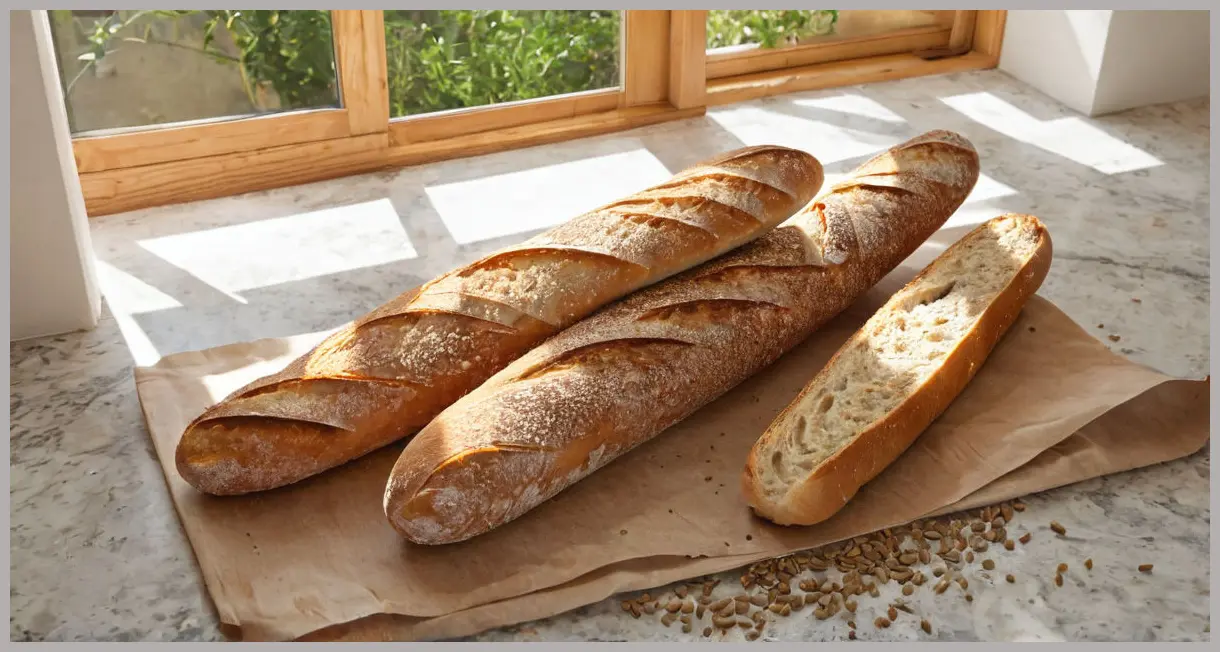
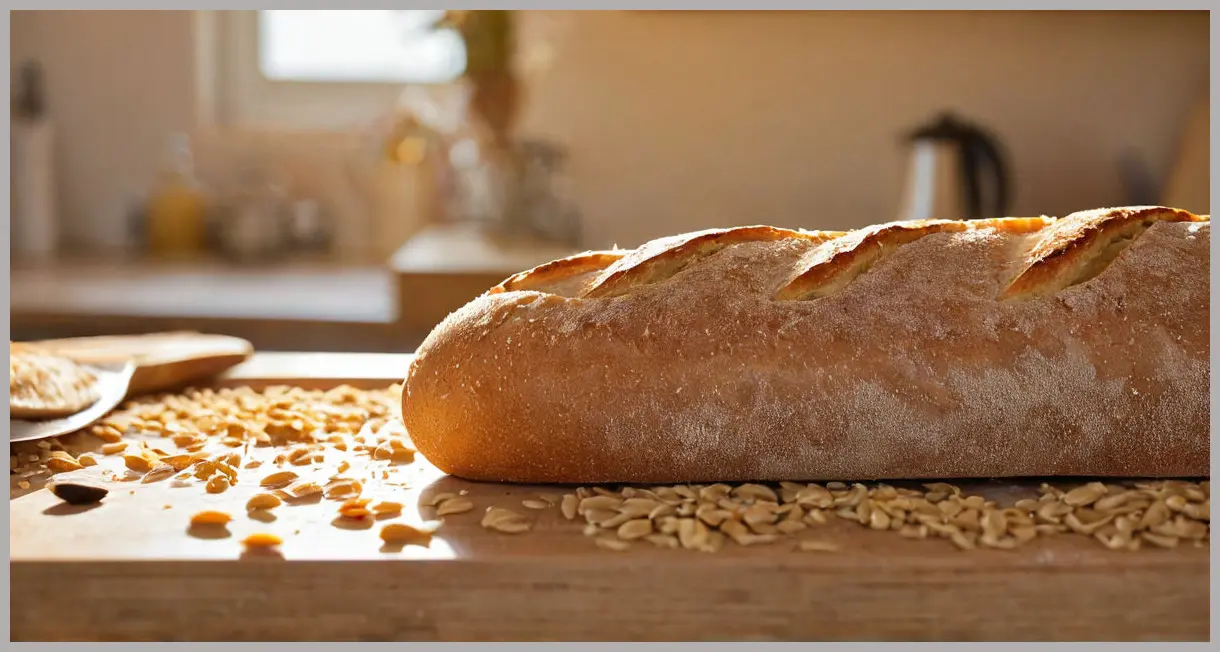
The Dusty Knuckle’s Linseed Baguettes
Crunchy on the outside, chewy on the inside – the perfect loaf for every kitchen.

Introduction
If you’ve ever dreamed of baking a baguette that feels as authentic as the ones you see on the streets of Paris, but without the intimidating French‑style techniques, this recipe is your ticket. The Dusty Knuckle’s Linseed Baguettes bring a rustic, wholesome twist to the classic French loaf, infused with the nutty flavor of linseeds and the hearty bite of wholemeal flour. The recipe is a challenge level – it requires patience, a bit of technique, and a willingness to let the dough do its thing, but the payoff is a loaf that will wow friends and family alike.
Whether you’re a beginner eager to step up your bread‑making game or an intermediate baker looking for a new project, this guide will walk you through every stage – from mixing the dough to scoring the final loaf. We’ll also dig into ingredient choices, give you serving suggestions, and offer variations so you can make the baguettes your own.

Meal Profile
| Feature | Detail |
|---|---|
| Title | The Dusty Knuckle’s Linseed Baguettes |
| Difficulty | A challenge |
| Portion | Makes 4 baguettes, each serving 2 |
| Time | • Hands‑on: 1 hour • Starter: 1 week • Bulk fermentation: 8–10 hours • Overnight chilling: up to 24 hours • Proving: 1 hour • Oven: 18 minutes |
| Description | Learn how to make The Dusty Knuckle’s crunchy‑on‑the‑outside, chewy‑on‑the‑inside linseed baguettes with a step‑by‑step recipe from the acclaimed London bakery. |
The recipe is built around a sourdough starter (135 g) that you’ll need to cultivate over the course of a week. Once you have a mature starter, the dough goes through a long, slow fermentation that develops flavor and texture. The linseeds add a delightful crunch and a dose of omega‑3 fatty acids, while the combination of wholemeal and white bread flour gives the loaf a robust structure and a pleasant nutty undertone.
Ingredient Highlight
Below is a quick reference to the ingredients, along with some tips on where to find them and why they matter.
| Ingredient | Quantity | Why It Matters |
|---|---|---|
| Wholemeal flour | 100 g | Adds fiber, depth of flavor, and a slightly denser crumb. |
| Strong white bread flour | 375 g (plus extra for dusting) | Provides the gluten network needed for the baguette’s rise and chewy interior. |
| Warm water | 370 g (plus 70 g for starter) | Hydrates the flour; the temperature (around 35 °C) encourages yeast activity. |
| Stiff starter | 135 g | The sourdough culture that leavens the dough and adds complex flavor. |
| Fine sea salt | 15 g | Balances sweetness, strengthens gluten, and controls fermentation. |
| Cooked porridge / overnight oats / bulgur / rice | 100 g | Acts as a pre‑fermented carbohydrate source, boosting flavor and adding a subtle sweetness. |
| Soaked linseeds | 100 g | Gives the baguette a crunchy texture and a nutty taste. |
| Vegetable oil | For greasing | Prevents sticking and helps the dough rise evenly. |
| Rice flour | For dusting | Non‑gluten flour that keeps the dough from sticking without affecting the crumb. |
| Digital thermometer | Optional | Ensures water temperature is optimal for yeast activity. |
| Dough scraper | Essential | Makes shaping and folding easier and cleaner. |
| Baking stone | Optional but recommended | Provides even heat and a crisp base. |
Where to buy: Most of these ingredients are available at any well‑stocked grocery store. For the best results, choose high‑protein bread flour (at least 12 % protein) and organic linseeds if you can find them. If you’re short on time, you can skip the overnight chilling step, but the flavor will be less complex.

Step‑by‑Step Instructions
Below is the full method, broken down into numbered steps. Each step is a direct copy of the original recipe’s instructions, but we’ll add context and practical tips to help you succeed.
Note: The recipe calls for a week of starter preparation. If you’re new to sourdough, start the starter at least 7 days before you plan to bake. Feed it twice a day, and by day 7 it should be bubbly, aromatic, and ready to use.
1. Hydrate the Flour
Step 1: Mix the flours and 300g of the warm water in a bowl until there are no wet or dry bits. Scrape down the bowl, cover, then set aside for 2–4 hours to allow your flour to hydrate fully.
- Combine the wholemeal and bread flours in a large mixing bowl.
- Add 300 g of warm water (use a digital thermometer to keep it around 35 °C).
- Stir until the mixture is smooth and no dry pockets remain.
- Scrape the sides of the bowl to ensure even distribution, then cover with a clean towel or plastic wrap.
- Let the flour soak for 2–4 hours; this step, called autolyse, improves gluten development and makes the dough easier to handle later.
2. Add the Starter, Salt, and Extras
Step 2: Weigh out your starter and add it with the remaining 70g warm water to the flour bowl. Squish, squeeze and squelch your dough. It will go weird and slimy, but don’t worry – this is normal. When it’s all combined, scrape down the bowl, cover it and set aside for 30 minutes. Add your salt to the bowl and mix this through, squeezing the dough again until the salt is totally incorporated. Add the porridge and soaked linseeds and work these into the dough mix – you want to give this a good 8 minutes. Use a scraper or your hands to get under the dough and lift it up, then lightly oil the inside of the bowl. Cover the bowl with a lid or a clean tea towel and leave it somewhere warm for 1 hour. Take a mental picture of how much the dough fills the bowl – by the end, you want it to have almost doubled.
- Measure 135 g of your sourdough starter and add it to the autolysed flour.
- Add the remaining 70 g of warm water to help dissolve the starter.
- Mix vigorously with a fork or your hands; the dough will feel sticky and a bit slimy—this is normal.
- Scrape the sides, cover, and let rest for 30 minutes.
- Sprinkle in 15 g of sea salt and fold the dough until the salt is fully incorporated.
- Add 100 g of cooked porridge (or your chosen pre‑fermented grain) and 100 g of soaked linseeds. Work the ingredients into the dough for about 8 minutes, using a scraper or your hands to lift and fold.
- Lightly oil the inside of the bowl to prevent sticking, then cover and set aside in a warm spot for 1 hour. Aim for the dough to almost double in volume.
3. Bulk Fermentation – The Fold Cycle
Step 3: For the next 4 hours you are going to give the dough a ‘fold’ every hour. This just means grabbing the edge of the dough with a wet hand, stretching it up as high as it will go and folding it over on itself, working around the bowl as many times as the dough will let you – until it feels tight and as if it might tear. Over 4 hours, this means you’ll have given the dough 3 folds. With each fold, you should be starting to see more life in the dough. This process is what we call the bulk fermentation and it’s where the magic is happening.
- Keep the dough in a warm, draft‑free spot (around 24 °C).
- Every hour, perform a stretch‑and‑fold:
- Wet your hand to prevent sticking.
- Reach into the bowl, grab a corner of the dough, stretch it upward.
- Fold it back over itself.
- Repeat around the bowl until you’ve completed a full rotation.
- Do this for 3–4 cycles, watching the dough grow and become more elastic. The dough should feel airy and slightly elastic, but not overly tight.
4. Final Rest and Refrigeration
Step 4: After the last fold, let the dough rest for a final 30(ish) minutes. You should have a shiny, coherent, strong dough that wobbles when you carefully prod it. If it feels wet and sticky, give it another fold and leave it for a further 30 minutes. If it feels strong, just not that lively, leave out the extra fold but still give it more resting time. This is the fermentation period, and you can’t really rush it – just let it do its thing. You’ll get a feel for this sweet spot the more you bake. Put the dough in the fridge overnight. This will help develop the flavour, let it rest and get lovely and strong. (It can stay in the fridge for up to 24 hours.)
- After the last stretch‑and‑fold, let the dough rest for about 30 minutes.
- Check its texture: it should be shiny, elastic, and slightly wobbly when you tap it.
- If it’s still sticky, give one more fold and rest for another 30 minutes.
- Once ready, place the dough in a lightly oiled container, cover, and refrigerate overnight (or up to 24 hours). The cold slow‑fermentation enhances flavor and strengthens the crumb.
5. Shape the Baguettes
Step 5: The next day, gently tip the dough out onto a flour‑dusted worktop and, without disturbing it much, cut it into 4 quarters – use a dough scraper to do this if you have one. With each quarter of dough, fold the points to the centre to make a very rough, long rectangle. You need to be gentle, but if you’re slow and too careful the dough will stick to your fingers and it’ll quickly get stressful. Flip the dough so the seams are facing down and the top is smooth, then let it rest for 30 minutes to come up to room temperature.
- Remove the dough from the fridge, let it sit at room temperature for 30 minutes.
- Dust a clean worktop with rice flour.
- Gently tip the dough onto the surface and divide it into 4 equal parts using a dough scraper.
- For each quarter, fold the ends toward the center to form a long rectangle.
- Flip the rectangle so the seam faces down; this will be the bottom during baking.
- Rest for 30 minutes to allow the dough to relax before shaping.
Step 6: Now flip the dough back over again so the seams are facing up – you want the rectangle to be oriented so the longest side is horizontal in front of you. Grab the top edge and fold it into the middle of the dough, then grab the bottom edge and fold it over to meet the new top edge. Gently seal along this length with your thumbs. Roll the dough over so the seam is on the bottom. Next, cup both hands over the dough, your fingers resting on the work surface at the top and the heel of your hand on the surface at the bottom. Roll the dough, working your hands away from each other, so you’re lengthening the baguette Push your hands down harder as you reach the ends so you get that lovely pointed shape. The trick is not to go over it too many times – once is ideal.
- Flip the rectangle so the seam is now on top.
- Fold the top edge into the center, then fold the bottom edge over the new top.
- Seal the seam with your thumbs.
- Roll the dough, keeping the seam on the bottom, to form a long, narrow shape.
- Use a gentle, continuous motion to elongate the loaf, applying slightly more pressure at the ends to create the classic baguette point.
- Avoid over‑rolling; a single pass is enough.
6. Proof the Baguettes
Step 7: Heavily dust a tea towel with rice flour and lay it in a shallow baking tray or something of a similar shape so it just hangs over one side and there’s plenty left on the other. Lay your first baguette seam‑side down along the edge of the tray with a little overhang, so the side supports it. Pull a fold of the tea towel up around it so it’s cradled on both sides. Put another baguette alongside and repeat. Do this for all 4 baguettes, nestling them against each other, then let them rest for 1 hour.
- Dust a clean tea towel with rice flour.
- Place the towel in a shallow tray so it drapes over one side.
- Position each baguette seam‑side down, letting a small portion hang over the edge.
- Fold the towel over the loaf, cradling it on both sides.
- Arrange all 4 baguettes in a single layer, nestling them together.
- Cover loosely with another towel and let them proof for 1 hour at room temperature.
7. Prepare the Oven
Step 8: Heat your oven to 220°C fan/gas 9 or as hot as it will go, and boil a kettle. Put a baking tin in the bottom of your oven and a baking sheet (or a baking stone, if you have one) on the middle shelf to heat up. Cut 4 slightly larger than baguette‑size pieces of baking paper and flip out the baguettes onto them with the seams facing up. These will act as a score – the loaf will open through the seam. The outcome is quite a rustic look, far from your traditional French stick.
- Preheat your oven to 220 °C (fan‑forced) or the highest setting.
- Place a baking tin on the bottom rack; fill it with a kettle of boiling water when ready to bake.
- Warm a baking sheet or stone on the middle rack.
- Cut 4 pieces of parchment paper slightly larger than the baguettes.
- Carefully slide each baguette onto a sheet of parchment, seam‑side up; this will serve as a gentle “score” and helps the loaf expand.
8. Bake to Perfection
Step 9: Working as quickly as you can, open the oven, take out your hot baking sheet or stone and use the baking paper strips as little hammocks to transfer each baguette onto the baking sheet/ stone. Pour some boiling water into the baking tin at the bottom and put the baguettes in the middle of the oven. Bake for 18 minutes or until lovely and dark.
- Quickly open the oven and remove the hot baking sheet or stone.
- Use the parchment strips to lift each baguette onto the hot surface.
- Pour a kettle of boiling water into the tin at the bottom of the oven to create steam.
- Place the baguettes in the middle rack.
- Bake for 18 minutes, or until the crust is a deep, golden‑brown and the loaf sounds hollow when tapped.
- Remove the baguettes and let them cool on a wire rack for at least 15 minutes before slicing.
Serving Suggestions & Variations
Classic Pairings
- Cheese & Charcuterie Board: Serve warm baguettes with a selection of cheeses (Brie, Gouda, aged cheddar) and cured meats.
- Mediterranean Spread: Spread hummus, tzatziki, or baba ganoush and top with chopped olives and feta.
- Grilled Vegetables: Pair with a medley of grilled zucchini, bell peppers, and eggplant for a wholesome meal.
Creative Twists
| Variation | What to Add | How It Changes the Loaf |
|---|---|---|
| Herb‑Infused | Add 1 tsp dried rosemary or thyme during step 2 | Adds aromatic depth and a savory note. |
| Sweet | Replace 100 g of porridge with 100 g cooked quinoa or rice | Gives a subtle sweetness and a firmer crumb. |
| Gluten‑Free | Use a blend of gluten‑free bread flour and vital wheat gluten | Maintains structure; may require extra kneading. |
| Spiced | Add ½ tsp ground cinnamon or nutmeg to the dough | Creates a warm, comforting flavor profile. |
Storage & Reheating
- Storage: Store the baguettes in a paper bag at room temperature for up to 2 days. Avoid plastic, as it will make the crust soggy.
- Reheating: Warm in a 180 °C oven for 5 minutes or toast in a skillet for a crispier crust.
- Freezing: Wrap tightly in parchment and then foil; freeze for up to 3 months. Thaw at room temperature and refresh in a hot oven for 10 minutes.

Conclusion
Baking The Dusty Knuckle’s Linseed Baguettes is a rewarding challenge that brings the art of sourdough bread to your home kitchen. By following the step‑by‑step instructions, you’ll master the delicate balance between a crunchy crust and a chewy interior, all while enjoying the nutty crunch of linseeds and the wholesome bite of wholemeal flour.
Remember, the key to success lies in patience: let the dough rest, fold, and ferment as directed. The long, slow fermentation not only develops flavor but also strengthens the gluten network, giving you a loaf that rises beautifully and holds its shape.
Once you’ve nailed the basic loaf, experiment with the suggested variations to make the bread truly your own. Whether you serve it with a charcuterie platter, a fresh salad, or simply enjoy it with a butter‑and‑honey spread, these baguettes will quickly become a staple in your culinary repertoire.
Happy baking, and may your kitchen always smell of freshly baked bread!

Leave a Reply