
Preserved Lemons: A Beginner‑Friendly Guide to Adding Zesty Brilliance to Any Dish
Preserved Lemons are a pantry staple that can transform an ordinary meal into something unforgettable. With just a handful of ingredients and a little patience, you can create a jar of bright, briny, citrusy goodness that lasts for months. Whether you’re a novice cook looking to expand your flavor repertoire or an intermediate chef seeking a new kitchen hack, this guide will walk you through every step of making preserved lemons, from selection to storage, and show you how to incorporate them into a variety of dishes.
Introduction
The concept of preserved lemons may sound intimidating at first, but it’s actually one of the simplest preservation methods you’ll ever encounter. The process relies on a salt brine that draws moisture out of the fruit, creating an environment where bacteria can’t thrive. The result? A tangy, slightly sweet, and intensely aromatic lemon that can be sliced, crushed, or simply added whole to sauces, stews, salads, and even desserts.
Why should you try preserved lemons?
- Flavor Explosion: They bring a complex citrus note that’s both sharp and mellow.
- Shelf‑Stable: Once sealed, they can be stored for months.
- Versatility: From Moroccan tagines to French vinaigrettes, the possibilities are endless.
- Minimal Ingredients: All you need is lemons, salt, and a few aromatics.
In this post, we’ll cover everything you need to know: the recipe itself, ingredient tips, detailed step‑by‑step instructions, serving ideas, variations, and storage advice. Let’s dive in!
Meal Profile
| Attribute | Detail |
|---|---|
| Title | Preserved Lemons |
| Difficulty | Easy |
| Portion | Makes 1 large jar (≈ 1.5 L) or a few smaller jars |
| Hands‑on Time | 10 min |
| Fermenting Time | 4–5 weeks |
| Description | With only two basic ingredients and some imaginative flavourings, preserved lemons are store‑cupboard stars. Make a jar or two with our easy recipe. |
This recipe is perfect for a beginner‑to‑intermediate cook because it requires no advanced techniques—just clean lemons, salt, and a jar. The long fermentation period means you can prepare the lemons ahead of time and have them ready whenever you need a burst of citrusy brightness.
Ingredient Highlight
Below is a breakdown of each ingredient, why it matters, and how it contributes to the final flavor profile.
| Ingredient | Quantity | Why It Matters |
|---|---|---|
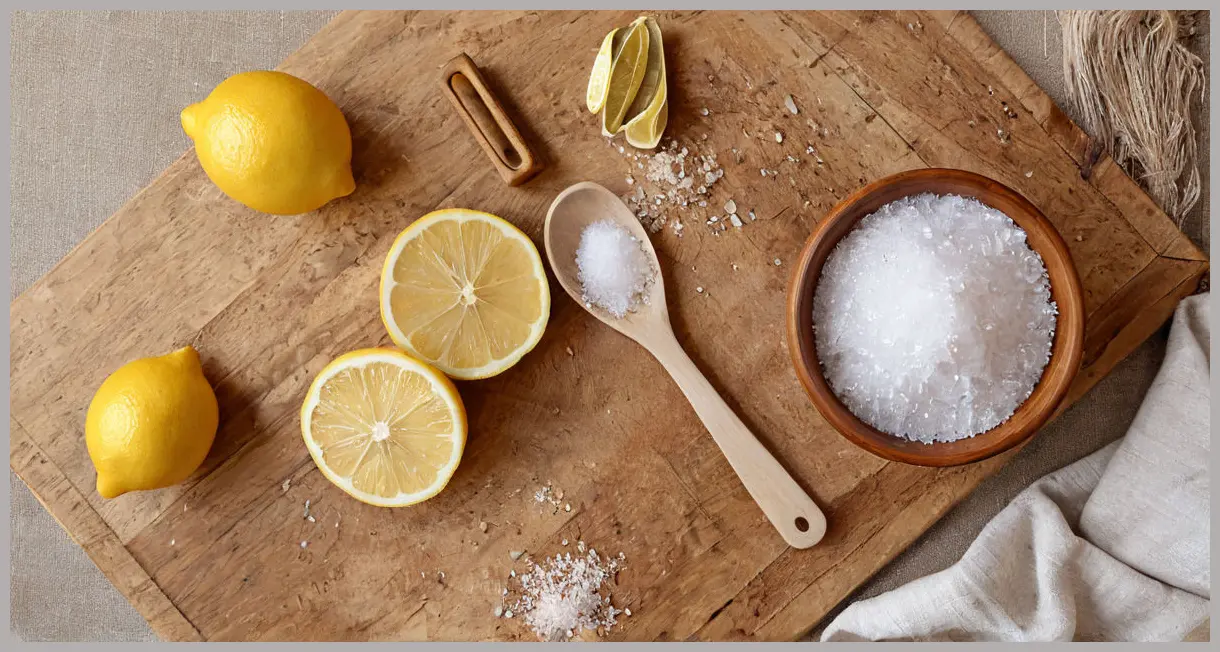
| 12 small unwaxed lemons (≈ 1 kg) | Fresh, firm, and fragrant | The lemon itself is the star; unwaxed lemons are easier to peel and have a cleaner taste. |
| 200 g pure salt | 2 tsp per lemon | Salt draws out moisture and acts as the preservative. |
| 8–10 mixed peppercorns | Whole or crushed | Adds subtle heat and a peppery undertone. |
| 2 fresh bay leaves | Contributes earthy, herbal aroma. | |
| 1 chilli, halved (optional) | For those who enjoy a kick; use mild or hot based on preference. | |
| 1 large jar (≈ 1.5 L) or smaller jars | Sterilised | Provides a sealed environment for fermentation. |
Tips for Selecting Lemons
- Size: Small lemons are ideal because they’re easier to cut and have a higher juice-to‑pulp ratio.
- Texture: Look for lemons with smooth, unblemished skins. Avoid those with soft spots or greenish patches.
- Waxy Coating: Unwaxed lemons are preferable because the wax can affect the texture and flavor of the preserved lemons.
Salt Choices
- Coarse sea salt or kosher salt works best because the grains are larger and dissolve slowly, providing a steady brine.
- Avoid iodised table salt; the iodine can alter the flavor.
Aromatics
- Peppercorns: Whole or lightly crushed. You can experiment with different varieties (black, white, pink) for nuanced flavor.
- Bay leaves: Fresh or dried; they add a subtle herbal depth.
- Chilli: Optional but recommended if you want a hint of heat. Use a mild variety for a gentle kick or a hotter pepper for more intensity.

Step‑by‑Step Instructions
Below is a numbered list of the method, extracted directly from the provided recipe. Follow these steps carefully for the best results.
-
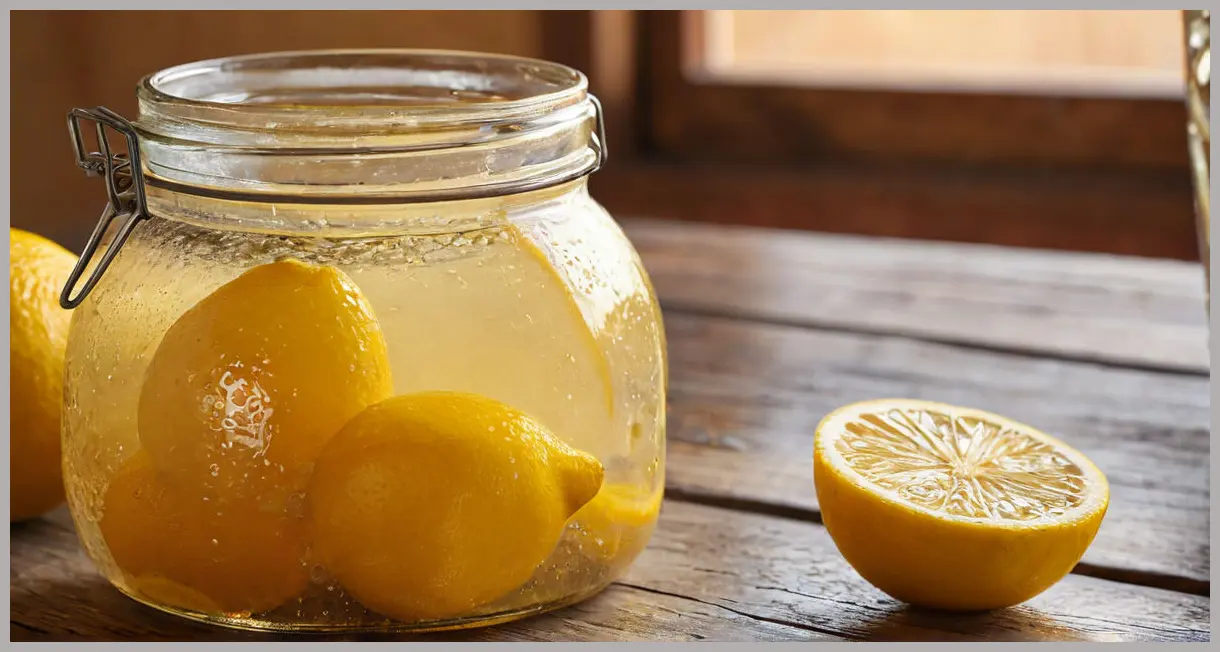
Juice 4 of the lemons and set the juice aside. Cut the rest of the lemons lengthways into quarters, stopping three quarters of the way through so the wedges are still attached at one end.
-
Sprinkle about 2 tsp salt onto the cut sides of each lemon, then layer in the jar(s) with the peppercorns, bay, chilli (if using) and any remaining salt. Press the lemons to help them release their juice, then pour in the reserved juice to cover. (If necessary, top up with filtered or boiled‑and‑cooled water to ensure the lemons are fully covered.)
-
Close the jar and set aside for 4–5 weeks in a cool spot, away from direct sunlight. Invert the jar every day for the first week or so to make sure the brine is evenly dispersed. The sealed jar(s) will keep for several months. Chill once opened and use within a couple of months.
Detailed Guidance
Step 1: Cutting & Juicing
- Juicing: Use a citrus juicer or a fork to extract the juice from the first four lemons. Keep the juice in a small bowl; you’ll add it back later.
- Cutting: Slice the remaining lemons lengthwise into quarters, but leave a small attachment at the base so the wedges stay together. This makes handling easier and prevents the wedges from falling apart during fermentation.
Step 2: Salting & Layering
- Salting: Lightly sprinkle the salt over the exposed flesh of each lemon wedge. The salt will begin to draw out moisture immediately.
- Layering: Place a few peppercorns, a bay leaf, and the chilli half on the bottom of the jar. Then add a layer of lemon wedges, followed by more aromatics, repeating until the jar is full. End with a final layer of salt.
- Pressing: Gently press the wedges to release more juice. This helps create an even brine.
- Adding Reserved Juice: Pour the reserved lemon juice over the layers until the fruit is fully submerged. If the liquid level is low, add filtered or boiled‑and‑cooled water to cover the lemons completely. This is crucial for preventing mold growth.
Step 3: Fermenting
- Sealing: Tighten the lid securely. If you’re using a glass jar with a rubber seal, make sure it’s airtight.
- Storage: Place the jar in a cool, dark area (like a pantry or cupboard) at room temperature. Avoid direct sunlight, which can degrade the lemons.
- Daily Inversion: For the first week, invert the jar once a day to redistribute the brine and ensure even fermentation.
- Fermentation Time: Let the lemons sit for 4–5 weeks. The longer they ferment, the deeper the flavor. Taste them after 4 weeks; if you prefer a milder citrus, stop early.
- Shelf Life: Once fully fermented, the jar can stay sealed for several months. After opening, refrigerate and use within a couple of months for optimal flavor.
Serving Suggestions & Variations
Preserved lemons are a flavor powerhouse, but they’re also incredibly versatile. Below are some ideas and variations to help you make the most of your jar.
Classic Uses
| Dish | How to Use Preserved Lemons |
|---|---|
| Tagine | Add a few wedges to a Moroccan chicken or lamb tagine for a bright, aromatic finish. |
| Salad | Roughly chop or slice the lemons and toss into a couscous or quinoa salad. |
| Stews | Stir in a handful of wedges during the last 10 minutes of cooking. |
| Sauces | Incorporate chopped preserved lemons into a beurre blanc or a vinaigrette. |
| Rice | Mix into pilaf or biryani for a citrusy lift. |
Creative Twists
- Herb‑Infused Preserved Lemons: Add rosemary, thyme, or oregano to the jar for an herbal twist.
- Smoked Preserved Lemons: Smoke the lemons before salting for a smoky, citrusy flavor that’s perfect for barbecue sauces.
- Spiced Preserved Lemons: Add cinnamon sticks, star anise, or cardamom pods for a warm, spiced profile ideal for desserts or spiced teas.
- Sweet Preserved Lemons: Use a touch of sugar or honey in the brine to create a sweeter version for use in cakes or pastries.
Pairing Ideas
| Preserved Lemon Flavor | Complementary Foods |
|---|---|
| Classic (salt & pepper) | Lamb, chicken, couscous, hummus |
| Mild (no chilli) | Fish, shrimp, rice dishes |
| Spicy (with chilli) | Beef, pork, spicy curries |
| Herbal (with bay leaves) | Roast vegetables, stews |
| Sweet (with sugar) | Desserts, fruit salads |
Storage & Shelf Life
- Refrigeration: After opening, keep the jar in the fridge. The brine will continue to develop flavor but at a slower pace.
- Use Within: Consume within 2–3 months for the freshest taste. The preserved lemons will keep longer if kept sealed, but their flavor may mellow over time.
Conclusion
Preserved lemons are a simple yet transformative ingredient that can elevate a wide range of dishes with minimal effort. By following the easy steps outlined above, you’ll have a jar of bright, briny, and aromatic lemons ready to infuse your cooking with a burst of citrusy brilliance. Whether you’re seasoning a hearty tagine, brightening a vinaigrette, or experimenting with new flavor profiles, preserved lemons will become a staple in your culinary arsenal.
Next Steps
- Try the classic recipe today and experiment with the suggested variations.
- Share your favorite preserved lemon dishes in the comments below.
- Bookmark this guide for your next grocery trip—your pantry will thank you!
Happy cooking, and enjoy the zesty magic of Preserved Lemons!

Leave a Reply