
Homemade Crispy Chilli Oil
The bold, aromatic, and fiery condiment that every beginner‑to‑intermediate cook can master.
Introduction
If you’ve ever drizzled a glossy, ruby‑red drizzle over a bowl of noodles, a steaming dumpling plate, or a simple stir‑fry and felt that instant surge of flavor, you already know the magic of chilli oil. Yet many home cooks shy away from making it from scratch, assuming the process is either too technical or too time‑consuming. Homemade Crispy Chilli Oil shatters those myths.
In this post we’ll walk you through every detail of creating a full‑flavoured, “in‑your‑face” oil that packs heat, spice, and the signature floral numbness of Sichuan peppercorns. The recipe is deliberately easy—perfect for anyone who’s comfortable with a saucepan and a thermometer, but still wants a result that tastes like it came from a bustling street stall in Chengdu.
Beyond the step‑by‑step guide, we’ll explore the story behind each ingredient, give you ideas for serving, and suggest creative twists so you can keep experimenting long after the first batch is done. By the end, you’ll have a versatile pantry staple that elevates everything from pizza to popcorn, and you’ll understand why this chilli oil deserves a permanent spot in your kitchen.
Meal Profile
| Attribute | Details |
|---|---|
| Title | Homemade Crispy Chilli Oil |
| Difficulty | Easy |
| Portion | Makes 250 ml (about 8‑10 fl oz) |
| Hands‑on Time | 30 minutes (plus overnight infusing) |
| Description | A full‑flavoured, in‑your‑face crispy chilli oil, with plenty of fire, spice and floral numbness from the Sichuan peppercorns. Use it as a base recipe to then tweak, amend and experiment with until you’ve found your perfect combination. |
Why the “overnight infusing” matters: The oil’s flavor deepens dramatically when the toasted spices and aromatics sit together at room temperature for several hours. The patience you invest after the cooking stage translates into a richer, more balanced heat that’s impossible to achieve with a quick‑pour‑and‑use approach.
Ingredient Highlight
Below is the complete ingredient list, presented exactly as the recipe provides it. For each component, we’ll add a short note on its role, storage tips, and possible substitutions for the adventurous or the allergen‑sensitive.
| Ingredient | Role & Tips |
|---|---|
| 250 g vegetable or sunflower oil | Neutral‑tasting carrier that can reach high temperatures without burning. Sunflower oil yields a slightly lighter mouthfeel, while vegetable oil is a budget‑friendly staple. |
| 2 slices fresh ginger | Adds a warm, peppery zing that balances the deep spice of the chilies. Slice thinly to release flavor quickly. |
| 3 banana shallots, finely sliced | Sweet, mild onion flavor; they crisp up beautifully, providing texture. If unavailable, substitute regular shallots or thinly sliced red onion. |
| 5 garlic cloves, finely sliced | Classic aromatic that deepens the oil’s savory base. Use fresh cloves for the best aroma; pre‑minced garlic can work but may burn faster. |
| 3 tbsp Sichuan peppercorns | The star of the show—imparts the signature “numbing” (má) sensation. Toast before crushing to unlock the citrusy oils. |
| 3 star anise | Gives a subtle licorice note that complements the heat. Remove before storage to avoid over‑infusion. |
| 1 cinnamon stick | Warm, sweet undertone that rounds out the spice profile. Like star anise, it’s removed after infusing. |
| 1 tsp fennel seeds | Adds a gentle anise‑like brightness; pairs nicely with the Sichuan peppercorns. |
| 50 g gochugaru (Korean red pepper flakes) | Provides bright, slightly smoky heat and a vivid red hue. If you can’t find gochugaru, use a blend of mild paprika and a pinch of smoked paprika. |
| 25 g chilli flakes, or crushed dried chillies | Boosts the overall spiciness. Adjust amount to suit your heat tolerance. |
| ½ tbsp sweet paprika | Contributes color and a mild sweetness without adding heat. |
| 2 dried bay leaves | Subtle herbal depth; removed after infusing. |
| 2 tsp salt | Enhances all flavors and helps balance the heat. |
| 1 tsp caster sugar | Slight sweetness rounds the sharpness of the chilies and spices. |
| Thermometer | Essential for monitoring oil temperature (target 160 °C). |
| Sterilised jar | Keeps the finished oil safe and extends shelf life. |
Pro tip: If you’re preparing multiple batches, you can toast the whole spice blend (peppercorns, star anise, cinnamon, fennel, bay leaves) in a single dry pan, then store it in an airtight container for up to a month. This saves time and ensures consistent flavor across batches.

Step‑by‑Step Instructions
Follow these numbered steps exactly as written in the original method. Each step has been extracted directly from the JSON data, preserving the chef’s intended order and details.
-
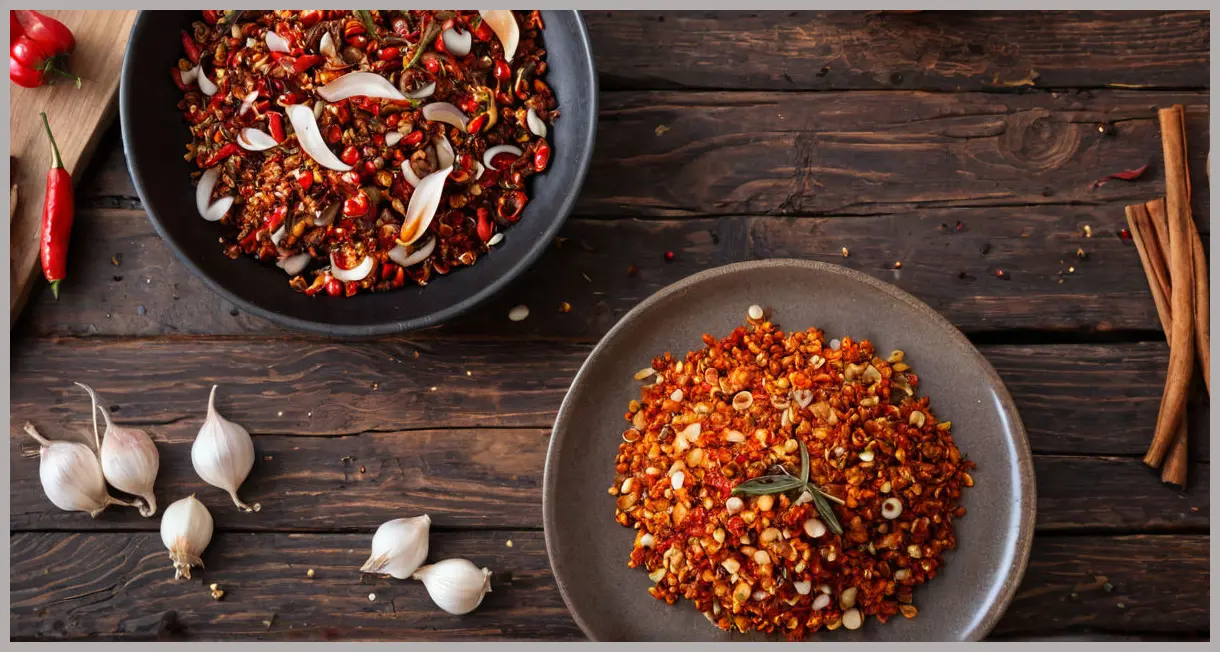
Heat the oil and aromatics – Pour the oil into a saucepan with a spout. Add the ginger, shallots and garlic, then place over a medium heat and gradually bring to 160 °C. Meanwhile, put the Sichuan peppercorns, star anise, cinnamon stick and fennel seeds in a dry frying pan and toast over a medium heat for a few minutes until fragrant. Crush the peppercorns and fennel seeds in a pestle and mortar.
-
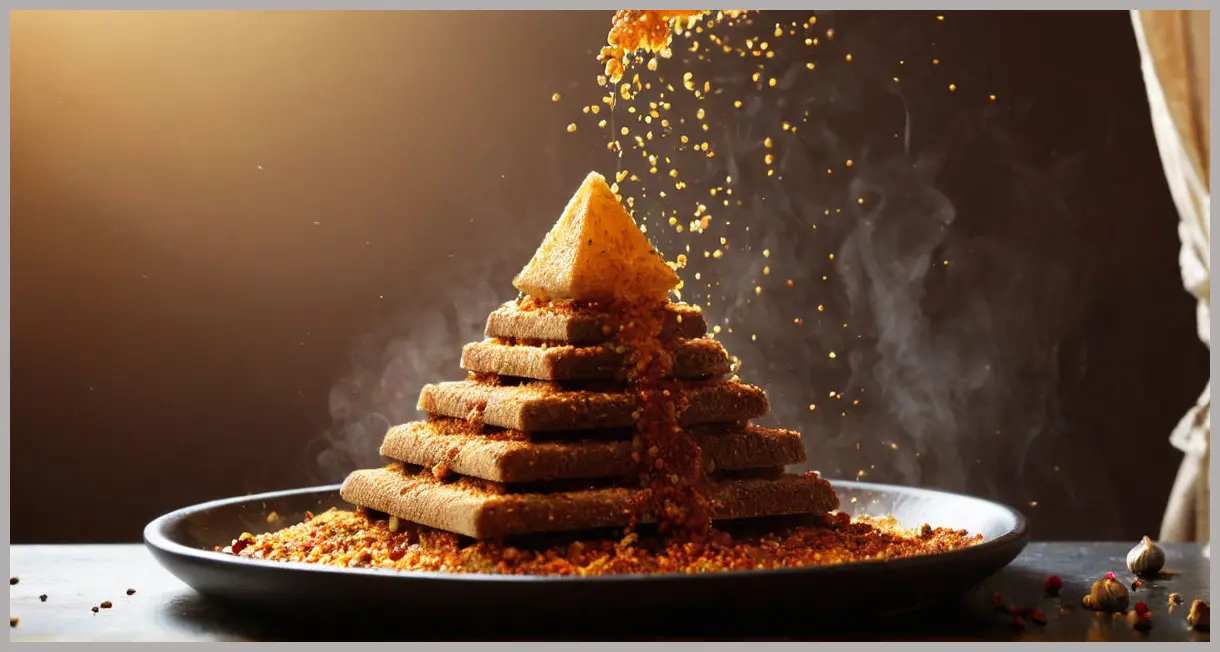
Prepare the spice pyramid – Mix the toasted spices with the remaining ingredients in a heat‑proof container that holds at least a litre, as the oil will bubble up a lot when you pour it in. Mould the mixture into a pyramid, then make an indent in the tip – this is what you’ll pour your oil into.
-
Crisp the shallots and garlic – As the oil heats up, the ginger, shallots and garlic will sizzle and begin to colour. As soon as they turn golden, remove them with a slotted spoon. Discard the ginger and leave the shallots and garlic to crisp up as they cool.
-
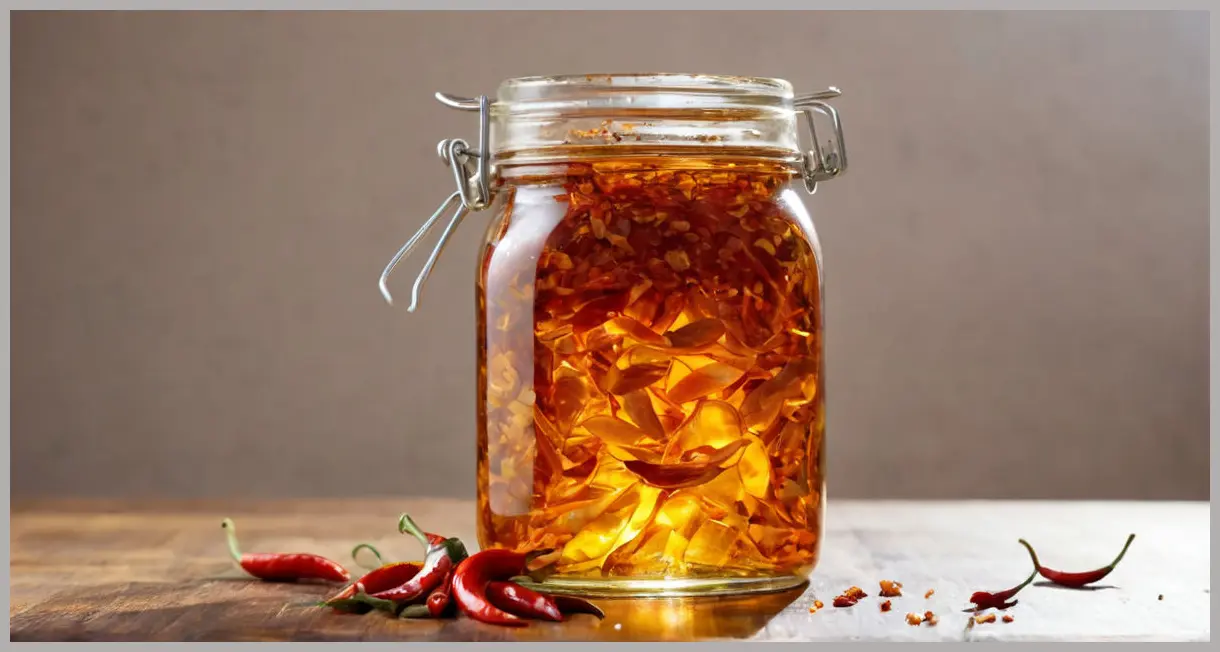
Combine oil with the spice pyramid – Once the oil is up to temperature, very carefully pour around a quarter of it into the chilli mixture – it will instantly bubble up and produce a lot of steam. Give everything a good mix, then continue to pour the oil slowly, until the bowl or jar is filled. Leave to cool for 10 minutes, add the fried garlic and shallots, then transfer to a sterilised jar. Seal and leave to infuse at room temperature overnight.
-
Finish and store – The next day, carefully remove and discard the star anise, cinnamon and bay leaves. Keep the chilli oil in the fridge for up to one month.
Safety reminder: Hot oil can splatter violently when it meets moisture. Keep a lid nearby, work in a well‑ventilated area, and never leave the pan unattended while it’s heating.
Serving Suggestions & Variations
Classic Uses
| Dish | How to incorporate the oil |
|---|---|
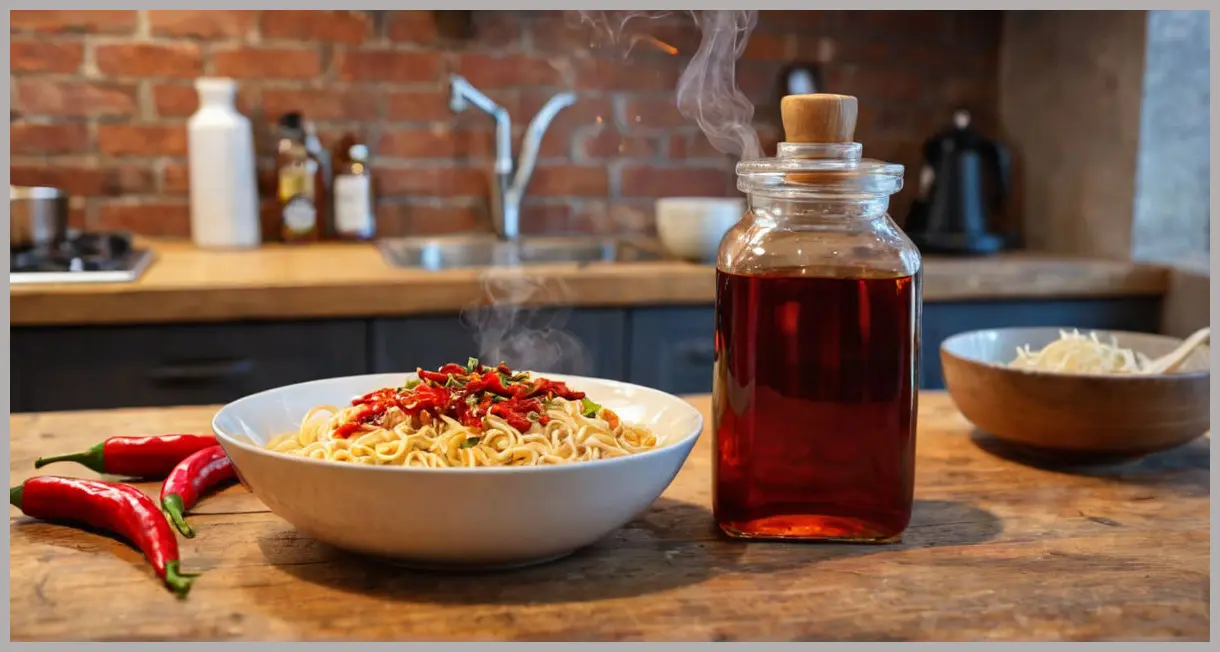
| Noodle bowls (ramen, udon, lo mein) | Drizzle 1–2 tsp over the finished bowl for an instant kick and glossy finish. |
| Stir‑fry vegetables | Add a splash during the last minute of cooking to coat veggies with heat and aroma. |
| Dumplings & potstickers | Serve a small dish of the oil on the side for dipping; the crispy garlic bits add texture. |
| Pizza | Brush the crust with a thin layer before baking, or drizzle after for a spicy, aromatic finish. |
| Popcorn | Toss hot popcorn with a teaspoon of oil and a pinch of sea salt for a gourmet snack. |
Creative Twists
-
Smoky BBQ Version – Replace half of the gochugaru with smoked paprika and add a teaspoon of liquid smoke to the oil before sealing. Great on grilled meats.
-
Citrus‑Infused – Add a strip of dried orange peel to the spice pyramid for a bright, citrusy note that pairs well with seafood.
-
Herb‑Forward – Swap the bay leaves for a few sprigs of fresh thyme or rosemary. The herbaceous aroma works beautifully on roasted potatoes.
-
Extra‑Numbing – Increase Sichuan peppercorns to 5 tbsp for a stronger “má” sensation. Balance with a little more sugar to keep the flavor rounded.
-
Vegan “Parmesan” – Blend the finished oil with toasted sesame seeds and nutritional yeast, then drizzle over pasta for a cheesy‑free, umami boost.
Storage Tips
- Refrigerate – The oil solidifies slightly when cold, but returns to liquid at room temperature.
- Avoid light – Store the jar in a dark pantry or cupboard; prolonged exposure can degrade the vibrant colour.
- Label – Write the production date on the jar; use within a month for optimal flavor.

Conclusion
Making Homemade Crispy Chilli Oil is a rewarding culinary adventure that proves bold flavor doesn’t have to be complicated. With just 30 minutes of attentive cooking and an overnight rest, you’ll transform inexpensive pantry staples into a vibrant, aromatic condiment that instantly upgrades any dish.
Because the recipe is intentionally easy, you can repeat it as often as you like, swapping chilies, herbs, or aromatics to discover your personal perfect blend. The process also teaches valuable skills—temperature control, spice toasting, and layering flavors—that translate to countless other recipes.
So grab your thermometer, fire up the stove, and let the sizzling symphony of ginger, garlic, and toasted spices fill your kitchen. In a day, you’ll have a jar of liquid fire ready to drizzle, dip, and delight. Happy cooking, and may every bite be as exciting as the first!

Leave a Reply