
Red Velvet Cake: A Beginner‑to‑Intermediate Guide to a Show‑Stopping Dessert
Introduction
There’s something undeniably magical about a Red Velvet Cake. Its deep ruby hue, velvety crumb, and tangy‑sweet cream cheese frosting make it a centerpiece for celebrations and a comforting treat for everyday indulgence. While the name might conjure images of elaborate bakery productions, the truth is far more approachable: with a clear plan, a few pantry staples, and a sprinkle of confidence, you can master this classic cake at home.
In this post we’ll walk you through every facet of the recipe—from the story behind the cake to a detailed, step‑by‑step breakdown of the method. By the end, you’ll not only have a gorgeous, bakery‑quality Red Velvet Cake on your table, but also a deeper understanding of the techniques that keep the crumb light and the frosting silky. Let’s dive in!
Meal Profile
| Attribute | Details |
|---|---|
| Title | Red Velvet Cake |
| Difficulty | Medium (perfect for beginner‑to‑intermediate bakers) |
| Portion | Serves 20‑24 |
| Time | Hands‑on: 40 min ⟶ Oven: 40 min (plus cooling & assembly) |
| Description | Although this red velvet cake recipe looks complex, it’s simple to make as long as you follow the recipe to the letter – it’s worth the effort as you’ll end up with a wonderfully light and scrumptious cake. |
Why this cake? The medium difficulty rating reflects a balance of essential baking skills—creaming butter, folding egg whites, and handling a multi‑layer assembly—without overwhelming a novice. The portion size makes it ideal for birthdays, holidays, or a weekend gathering where you want to impress a crowd without the need for multiple batches.

Ingredient Highlight
A well‑written ingredient list is the backbone of any successful bake. Below, each component is grouped by its role, with notes on why it matters and possible swaps for those with dietary preferences.
The Sponge
| Ingredient | Quantity | Role & Tips |
|---|---|---|
| Unsalted butter, softened | 200 g (+ extra for greasing) | Provides richness and structure. Use room‑temperature butter for a smooth cream. |
| Plain flour | 235 g (+ extra for dusting) | Forms the base of the crumb. Sifting ensures a light texture. |
| Caster sugar | 400 g | Sweetens and helps aerate when creamed with butter. |
| Vanilla extract | 1 tsp | Adds depth to the flavor profile. |
| Large free‑range eggs, separated | 4 (yolks + whites) | Yolks enrich the batter; whites create lift when folded in. |
| Cornflour | 30 g | Lightens the crumb, giving that signature “velvet” feel. |
| Baking powder | 1 tbsp | Leavening agent for a gentle rise. |
| Cocoa powder | 2 tbsp | Gives a subtle chocolate note without darkening the red color. |
| Buttermilk | 235 ml | Reacts with vinegar to create tender crumb and a slight tang. |
| Red food colouring (Silver Spoon) | 60 ml | Provides the iconic ruby shade. Adjust to your preferred intensity. |
| White wine vinegar | 1½ tsp | Activates the baking soda, contributing to lift and a faint tang. |
| Bicarbonate of soda (baking soda) | 1½ tsp | Works with the vinegar for a light, airy texture. |
The Frosting
| Ingredient | Quantity | Role & Tips |
|---|---|---|
| Double cream | 300 ml | Whipped to medium‑firm peaks for a light, airy frosting. |
| Full‑fat cream cheese (Philadelphia) | 600 g | Gives the classic tangy cream cheese flavor. Use room‑temperature cheese for a smooth blend. |
| Mascarpone | 500 g | Adds silkiness and richness, balancing the tang of cream cheese. |
| Icing sugar | 300 g | Sweetens and stabilizes the frosting. Sift to avoid lumps. |
| White chocolate holly leaves & gold sugared almonds | – | Decorative touches that elevate presentation. Feel free to substitute with edible glitter or fresh berries. |
Pro tip: If you prefer a lower‑fat version, substitute part of the double cream with Greek yogurt, but keep in mind the texture will be slightly denser.
Step‑by‑Step Instructions
Below is a numbered list that pulls directly from the original method, reformatted for clarity. Follow each step in order, and you’ll end up with six perfectly baked sponge rounds ready for assembly.
- Prepare the tins and cream the butter
- Preheat the oven to 180 °C (fan 160 °C, gas mark 4).
- Grease, dust with flour, and line the base of three 20 cm loose‑bottomed cake tins.
- In a large mixing bowl, cream the softened butter and caster sugar with an electric hand whisk for 5 minutes or until the mixture is pale and fluffy.
- Add the vanilla extract and the egg yolks one at a time, beating well after each addition.
- Combine dry and wet components
- In a second large bowl, whisk together the plain flour, cornflour, baking powder, and cocoa powder.
- In a third bowl, mix the buttermilk with the red food colouring.
- Sift one‑third of the dry mixture into the butter‑egg mixture, then pour in one‑third of the coloured buttermilk. Mix until just combined.
- Repeat the process with the remaining dry ingredients and buttermilk, always mixing just until incorporated to avoid over‑working the batter.
- Incorporate the egg whites
- In a clean, dry bowl, whisk the egg whites with a pinch of salt until they form fairly firm peaks.
- Gently fold the whipped egg whites into the cake batter a quarter at a time, using a large metal spoon. Fold until just incorporated; the batter should stay light and airy.
- Add the vinegar‑bicarbonate reaction
- In a small bowl, combine the white wine vinegar and bicarbonate of soda; the mixture will bubble.
- Gently fold this bubbly mixture into the batter.
- Quickly divide the batter evenly among the prepared tins and smooth the tops with a spatula.
- Bake and cool
- Bake for 40 minutes, or until a skewer inserted into the centre of each sponge comes out clean.
- Allow the cakes to cool in the tins for 10 minutes, then turn them out onto wire racks to cool completely.
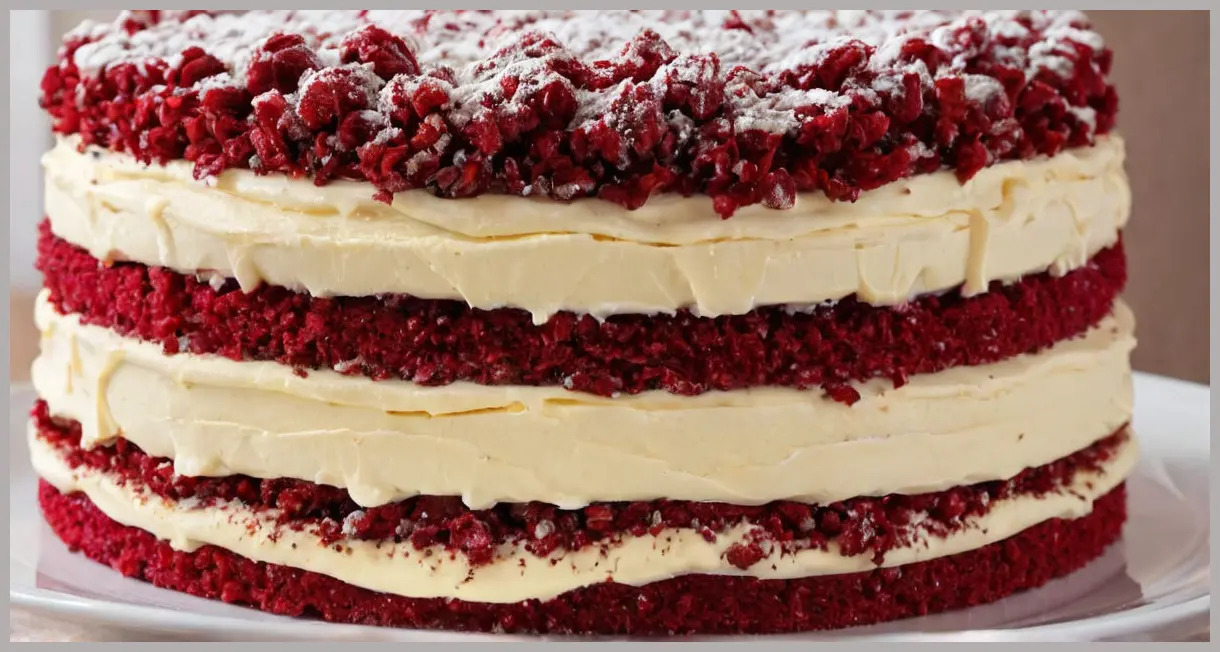
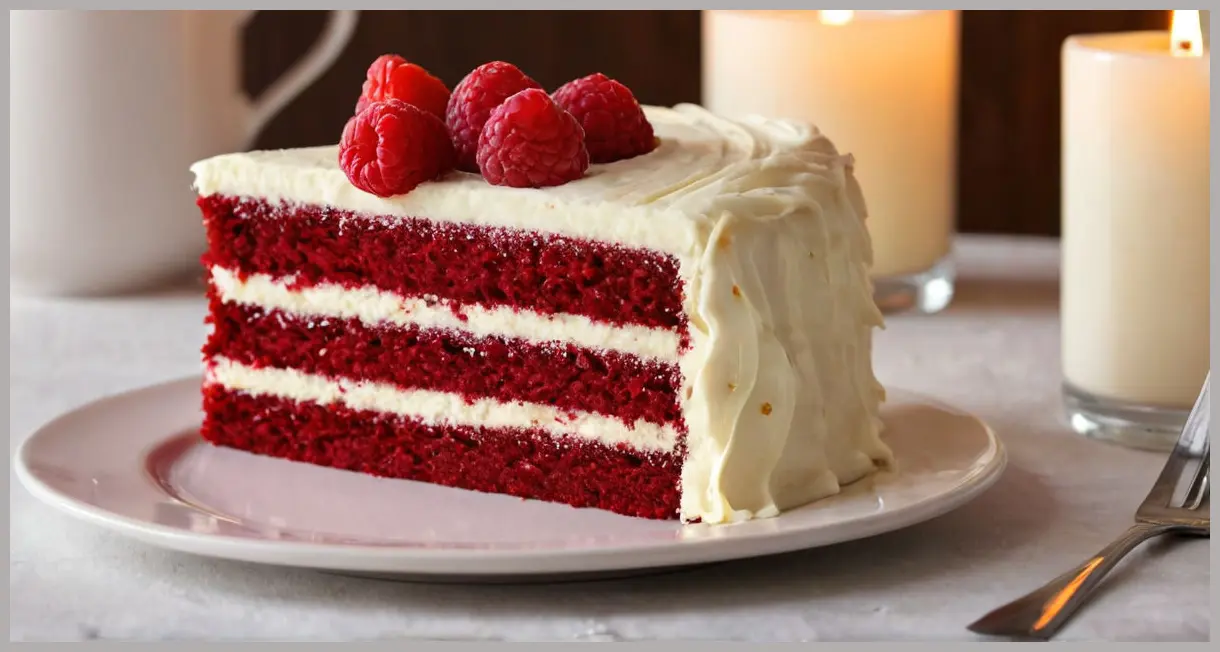
- Once cooled, cut each sponge horizontally in half, yielding six rounds total.
- Prepare the frosting
- Whip the double cream in a large bowl until you achieve medium‑firm peaks; set aside.
- In a separate bowl, beat the cream cheese, mascarpone, and icing sugar together until the mixture is stiff and smooth.
- Fold the whipped cream into the cheese mixture until fully incorporated, creating a light, buttery frosting.
- Assemble the cake
- Place one sponge round on a serving platter and spread a generous layer of frosting over the top.
- Stack a second sponge on top and repeat the process, continuing until all six layers are stacked with frosting between each.
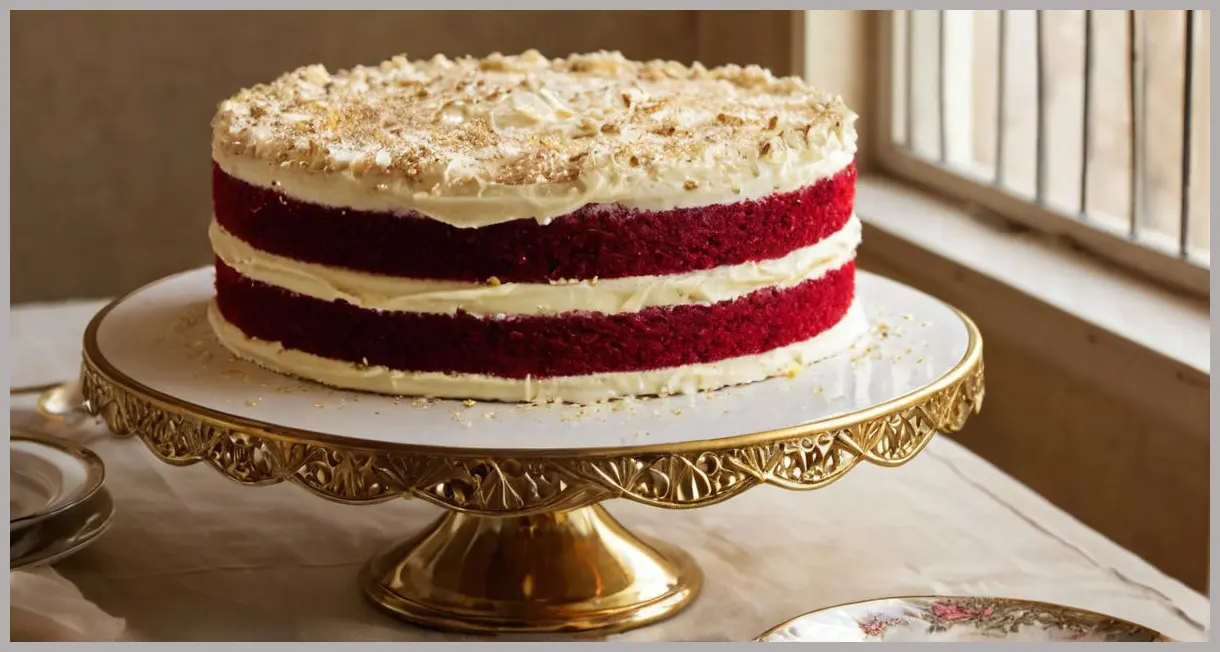
- Use the remaining frosting to cover the top and sides of the cake, smoothing with a palette knife for an even finish.
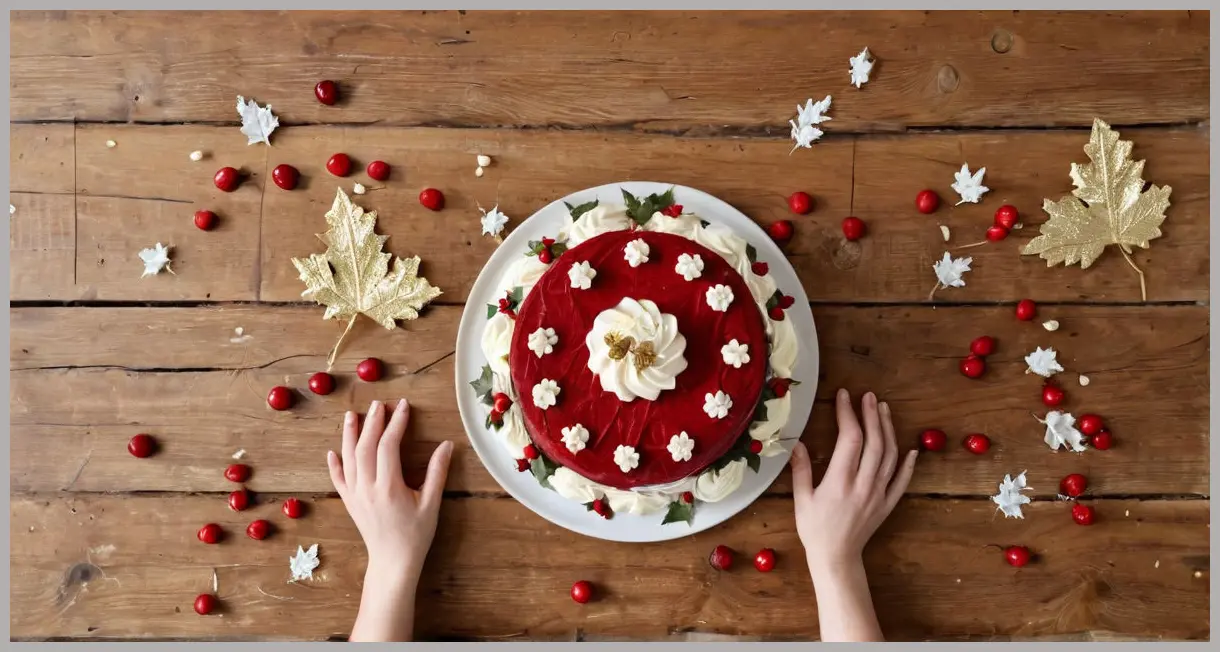
- Decorate the top with white chocolate holly leaves and gold sugared almonds for a festive look.
- Chill the assembled cake for a few hours (or overnight) before slicing; it will keep in the refrigerator for four days.

Serving Suggestions & Variations
Classic Presentation
- Slice with a hot, wet knife to achieve clean, uniform pieces.
- Serve each slice with a dollop of freshly whipped cream or a scoop of vanilla ice cream for extra indulgence.
Flavor Twists
| Variation | How to Incorporate |
|---|---|
| Citrus Zest | Add 1 tsp orange zest to the batter for a bright, aromatic lift. |
| Coffee‑Infused | Dissolve 1 tsp instant espresso in the buttermilk before mixing. |
| Nutty Crunch | Fold ½ cup toasted chopped pecans into the frosting for texture. |
| Gluten‑Free | Substitute plain flour with a 1:1 gluten‑free blend; ensure the blend contains xanthan gum for structure. |
| Vegan | Replace butter with plant‑based margarine, use aquafaba (chickpea water) instead of egg whites, and swap cream cheese & mascarpone for vegan cream cheese alternatives. Adjust the baking time slightly if needed. |
Pairings
- Beverage: A glass of chilled Prosecco or a spiced chai complements the cake’s richness.
- Fruit: Fresh raspberries or sliced strawberries add a tart contrast that brightens each bite.
Storage Tips
- Refrigeration: Keep the cake covered loosely with plastic wrap to prevent the frosting from drying out.
- Freezing: For longer storage, wrap individual slices in parchment paper, then foil, and freeze for up to 2 months. Thaw in the fridge overnight before serving.
Conclusion
Creating a Red Velvet Cake at home may feel like a culinary adventure, but with the right mindset and this detailed roadmap, the process is entirely within reach for beginner‑to‑intermediate cooks. The key lies in respecting each step—especially the gentle folding of the egg whites and the precise timing of the vinegar‑bicarbonate reaction—to achieve that coveted light, airy crumb.
Once assembled, the velvety cream cheese frosting and elegant decorations turn a simple home kitchen into a boutique patisserie. Whether you’re celebrating a birthday, hosting a holiday brunch, or simply treating yourself to a slice of decadence, this cake delivers both visual impact and unforgettable flavor.
So preheat that oven, gather your ingredients, and let the rich ruby hue of the batter inspire you. With patience, a few whisking motions, and a dash of creativity, you’ll soon be serving a masterpiece that will have friends and family asking, “Is that from a bakery?”
Happy baking! 🎂✨

Leave a Reply