
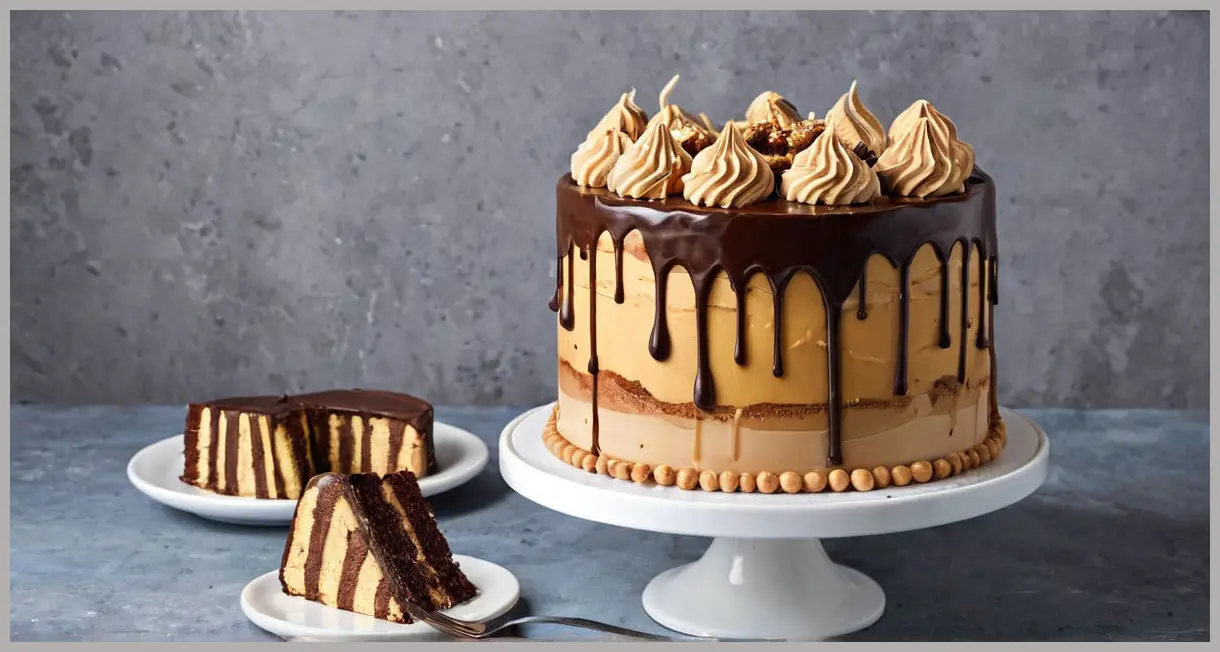
Peanut Butter Drip Cake
Chocolate‑and‑peanut‑butter decadence for the daring dessert lover

Introduction
There’s an old saying that a true dessert is “two good flavours that meet in the middle.” In the world of baking, the peanut butter‑drip cake is an audacious yet approachable champion that balances the deep bitterness of dark chocolate with the silky, slightly salty sweetness of creamy peanut butter.
If you’ve mastered the basics of a moist chocolate sponge and have a few more tricks up your sleeve, this recipe is right in your comfort zone. The result is a multi‑layered confection that will wow at brunches, birthdays, or whenever you’re craving something on the indulgent side.
In this post we’ll walk you step‑by‑step through the Peanut Butter Drip Cake, exploring the perfect balance of flavors, the science behind a silky ganache, and clever ways to customize the decked‑out masterpiece.
Meal Profile
| Detail | Value |
|---|---|
| Title | Peanut Butter Drip Cake |
| Difficulty | Medium |
| Portion | Serves 20 |
| Time | Hands‑on time 1½ hours, oven time 20–25 min, plus chilling |
| Description | A dark chocolate sponge is sandwiched and covered with peanut buttercream, drizzled with a rich chocolate ganache then topped with chocolate biscuits and sweets. |
You’ll need a decent amount of time in the kitchen, a few 20 cm baking tins (we used three), and a good electric mixer. Audio‑friendly? Not though, but your palate will definitely thank you.
Ingredient Highlight
Here’s the arsenal of ingredients used in this cake. Pay careful attention to the quality of each element; the dessert’s depth of flavor relies heavily on the heft of the chocolate and the finish of the peanut buttercream.
| Category | Ingredients |
|---|---|
| Chocolate Sukker‑Splash | 80 g dark cocoa powder (Green & Blacks), 350 g light muscovado sugar, a teaspoon of espresso powder |
| Moisture & Fat | 300 ml boiling water, 300 g unsalted butter (softened, plus extra for greasing), 150 g dark chocolate (coarsely chopped) |
| Eggs & Flavor | 6 medium free‑range eggs (fridge‑cold), 1 tbsp vanilla bean extract |
| Leavening & Dry Bulk | 220 g plain flour, 1 tsp bicarbonate of soda, 1 tsp baking powder |
| Buttercream Armor | 225 g unsalted butter (softened), 250 g smooth peanut butter, 375 g icing sugar, 1 tsp vanilla extract, ½ tsp fine sea salt, 2 tbsp milk |
| Ganache Glam | 150 g dark chocolate (at least 70 % cocoa solids, finely chopped), 300 ml double cream |
| Tools & Extras | 3 × 20 cm sandwich tins (greased & lined with non‑stick baking paper), electric mixer, balloon whisk, piping bag, parchment paper, a serrated knife, palette knife, non‑stick silicone spatula |
| Optional Garnish | Oreos, M & Mʼs, Kit Kat bars, chocolate biscuits, or any sweet that melts in your mouth |
Feel free to substitute the chocolate with a more or less intense variant—80 g of premium 72 % cacao or even a darker 85 % will change the final profile but keep the structure intact.
Step‑by‑Step Instructions
Below is the journey from raw ingredients to a spectacular bread‑like masterpiece. Follow the numbering, keep a stopwatch handy, and let your kitchen become a lab of delicious science.
- Prepare the cocoa‑espresso infusion
- Heat the oven to 170 °C (150 °C fan) or gas 3½.
- In a large measuring jug, combine the cocoa powder, 100 g of the muscovado sugar, and the espresso powder.
- Pour the boiling water over the dry mixture and whisk with a balloon whisk until completely smooth.
- Melt butter‑sugar‑chocolate base
- In a medium pan over a low heat melt the 300 g of unsalted butter and the remaining sugar until the sugar dissolves.
- Add the 150 g of dark chocolate, slowly integrating it by stirring occasionally until fully melted.
- Helm the batter
- Remove the pan from heat.
- Stir in the cocoa‑espresso mixture, then incorporate the beaten eggs and vanilla bean extract, whisking vigorously.
- Sift the flour, bicarbonate of soda, and baking powder into a large mixing bowl. Sprinkle lightly with sea salt.
- Pour the wet chocolate mixture over the dry ingredients. Using a ball‑whisk, gently blend until a smooth, homogenous batter presents itself.
- Bake the sponges
- Divide the batter evenly among the three greased and lined 20 cm tins. Level each layer with a spatula.
- Bake for 20–25 minutes. The sponges should rise nicely and reject a skewer inserted into the centre.
- Cool for five minutes in tins. Once warm, turn each cake onto a wire rack to chill completely.
- Whip the peanut buttercream
- In a mixing bowl, combine 225 g softened butter and 250 g smooth peanut butter.
- Using an electric mixer, whip until the blend is light and airy.
- Gradually fold in icing sugar, one‑third at a time, whisking between each addition until the mixture becomes smooth and stiff.
- Add vanilla, sea salt, and enough milk to achieve a spreadable yet firm consistency.
- Assemble the tiered cake
- Use a serrated knife to level if any sponge has uneven edges.
- Place a teaspoon of buttercream in the centre of a plate (or a stand) as a polishing base.
- Position the first sponge atop, then spread a 5 mm layer of buttercream on top of it.
- Repeat with the remaining two sponges, stacking until all three layers unite.
- After each layer, apply a thin, even coat of buttercream to the exterior (the crumb coat).
- Chill the fully assembled cake for 30 minutes to set the crumb coat.
- Finish the outer shell
- Spread the remaining buttercream smoothly over the entire cake surface using a spatula or a frosting knife.
- Return to the fridge as you prepare the ganache.
- Create the ganache
- Finely chop 150 g dark chocolate and hold it in a large heat‑proof bowl.
- In a separate pan, place 300 ml double cream over medium heat. Warm until it starts to bubble at the edges (do not let it boil).
- When the cream tips over, pour it into the bowl over the chocolate. Let it stand 2 minutes before stirring.
- Whisk until the chocolate fully dissolves; the ganache should be glossy and slightly runny.
- Transfer the ganache to a piping bag for precise drips.
- Apply the chocolate ‘drips’
- Snip a small hole at the bottom of the piping bag.
- Pipe wide, generous ribbons of ganache around the cake’s edge, allowing the chocolate to slide down the sides creating the “drip” effect.
- Once satisfied, cover the cake’s top with the leftover ganache, smoothing with a palette knife.
- Return the cake to the refrigerator for about 30 minutes while the ganache sets into a usable glaze.
- Decorate & serve
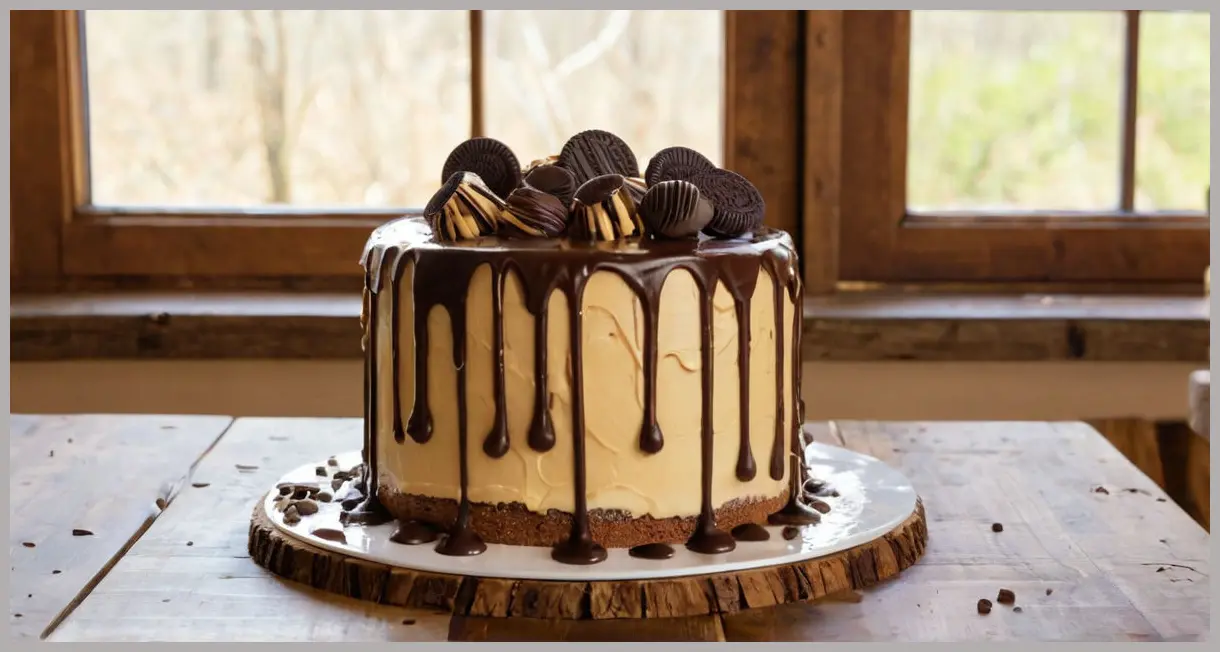
- With a delicate flourish, adorn the cake with an assortment of your favourite chocolates or sweets.
- Popular choices are Oreos, M & Mʼs, Kit Kat bars, or tasteful chocolate biscuits.
- Cut with a warm knife, wiping the edge clear, and serve in individual rounds or chunks!
Your creation is now ready to impress or to haunt dreams—whichever you prefer.

Serving Suggestions & Variations
Classic Presentation
- Serve in well‑chilled plates: The ganache’s semi‑soft state will resist melting if you keep the cake under 18 °C.
- Accompany with a splash of coffee or espresso: The bitter undertones cut through the richness of chocolate and peanut butter.
- Add fresh berries: Introduce a handful of raspberries or blueberries for a pop of acidity and color.
Tweak the Sauce
- Replace the double cream with whipped coconut cream for a tropical twist that pairs nicely with extruded peanut butter.
- Inline a few toasted almond or hazelnut shards into the ganache for crunchy undertones.
Peanut Butter Variants
- Natural peanut butter (no added sugar): Keep the dough crisp but lighten the overall sweetness.
- Almond Butter or Cashew Butter may provide subtle flavor differences while keeping the structure.
Sweetening Alternatives
- Swap muscovado for raw cane sugar or coffeecake sugar to lower the glycemic impact, albeit slightly altering the caramel depth.
- For a low‑carb version, replace the icing sugar with erythritol or allulose (but note the texture may be airy).
Themed Finishes
- Align the décor with the season: scatter dried fruit or edible gold dust over a “winter wonder” cake; use orange zest and candied ginger for a “pumpkin spice” dessert.
- Flip the color story by glazing the ganache with 1 tbsp of espresso‑infused cream for a dystopian espresso‑black cake.
Feel free to experiment—afterall, the original recipe invites personal adventure.

Conclusion
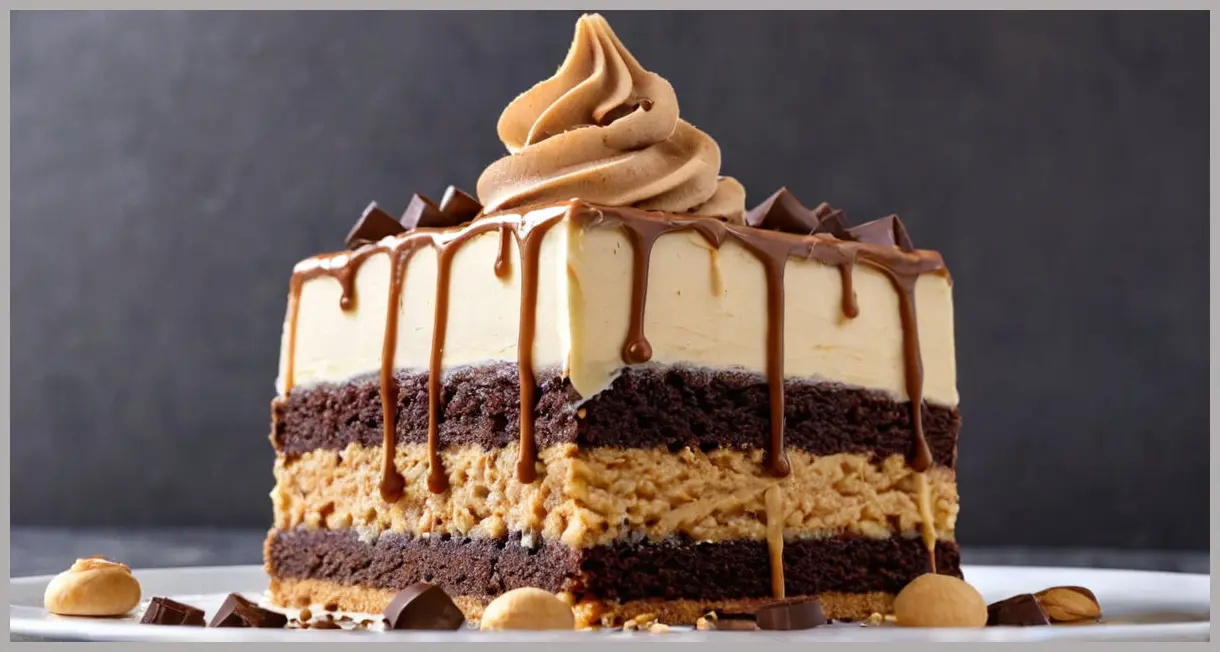
The Peanut Butter Drip Cake is a masterclass in balancing intensity with texture. The dark chocolate sponge you bake from scratch offers a tempting velvety mouthfeel, while the peanut buttercream delivers rich, salty contrast. Finally, gluery chocolate ganache–drips add a dramatic splash of sweetness that dramatizes the whole structure.
Not only does the recipe provide a blissful dessert for any celebration, but it also offers a training ground for mastering the fundamentals of sponge baking, ramekin frosting, and ganache preparation.
Whether you’re prepping for a family gathering or simply exploring the brave edges of baking, this cake stands as a testament to how classic components can be combined into an unexpectedly elegant dessert.
Happy baking, and may your batter rise perfectly and every drip fall exactly where it should!

Leave a Reply