
Gluten‑Free Birthday Cake Sponge: A Celebration‑Ready Treat for Every Skill Level
Posted on: 2025-09-30
Introduction
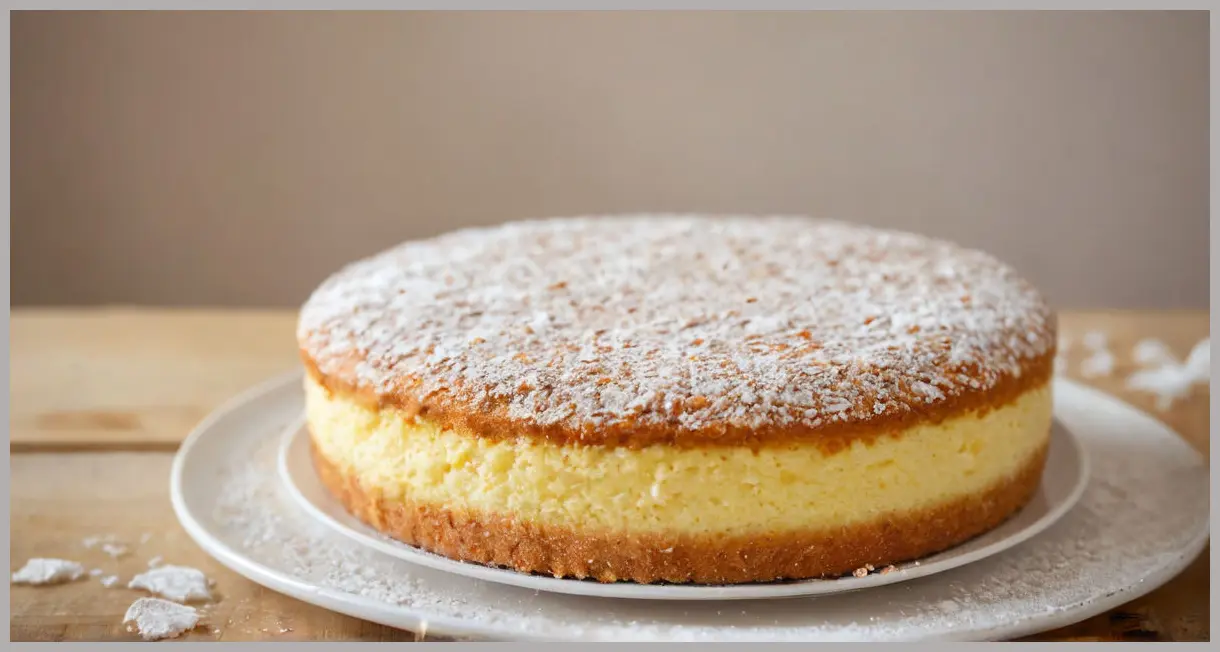
Celebrating a birthday should feel effortless, even when you have to accommodate dietary restrictions. That’s why Gluten‑Free Birthday Cake Sponge has become a go‑to recipe for families and friends who want all the joy of a classic birthday cake without the worry of wheat‑based flour. Created by celebrated chef Phil Vickery, this sponge is easy to master, yields a generous serves 12‑16 slices, and only requires a short hands‑on time of 20 minutes plus a modest oven time of 25‑30 minutes.
If you’re a beginner‑to‑intermediate cooking enthusiast, you’ll appreciate how the recipe balances simple pantry staples with a few specialty items (like potato starch and glycerine) to produce a light, airy crumb that stays moist for days. In this post we’ll break down the entire process, highlight why each ingredient matters, and share tips for decorating and customizing your cake so it looks as spectacular as it tastes. Let’s dive into the world of gluten‑free baking and discover how a single sponge can become the centerpiece of a memorable birthday celebration.
Meal Profile
| Attribute | Details |
|---|---|
| Title | Gluten‑Free Birthday Cake Sponge |
| Difficulty | Easy |
| Portion | Serves 12‑16 |
| Time | Hands‑on: 20 min · Oven: 25‑30 min |
| Description | Phil Vickery’s gluten‑free sponge cake recipe keeps all the fun of a birthday cake, just without the wheat flour. |
| Key Features | – Naturally gluten‑free – Moist, tender crumb – Versatile base for any filling or decoration – No specialized equipment required (just a mixer and two 23 cm round tins) |
The Gluten‑Free Birthday Cake Sponge is designed to be a reliable foundation for any birthday cake theme—whether you prefer a classic vanilla buttercream, a luscious chocolate ganache, or a fresh fruit‑infused mousse. Because the sponge itself is mildly flavored with vanilla and a hint of olive oil, it pairs beautifully with both sweet and subtly savory fillings.
Ingredient Highlight
Below is the complete ingredient list, presented in a clear, beginner‑friendly format. Understanding the role each component plays will boost your confidence and help you troubleshoot any issues that may arise.
| Ingredient | Amount | Why It Matters |
|---|---|---|
| Unsalted butter (room temperature) | 225 g | Provides richness, contributes to the tender crumb, and helps the cake rise evenly. |
| Condensed milk (room temperature) | 397 g (one 14‑oz tin) | Adds natural sweetness, moisture, and a subtle caramel note that keeps the sponge moist for days. |
| Potato starch | 75 g | A gluten‑free thickening agent that gives the cake structure without making it dense. |
| Brown rice flour | 200 g | The primary gluten‑free flour; offers a light texture and a mild, nutty flavor. |
| Free‑range eggs (beaten) | 4 medium | Acts as a leavening aid and binds the batter together; the beaten eggs also incorporate air for a fluffy rise. |
| Gluten‑free baking powder | 3 tsp (level) | The chemical leavener that creates the classic “rise” in a sponge cake. |
| Vanilla extract | 3 tsp | Enhances aroma and rounds out the sweetness. |
| Glycerine | 2 tsp | Retains moisture, ensuring the cake stays soft and prevents it from drying out. |
| Olive oil | 3 tbsp | Adds a silky mouthfeel and a faint fruity note that complements the vanilla. |
| Warm water | 3 tbsp | Helps dissolve the glycerine and oil, creating a smooth batter. |
| Butter (for greasing) | As needed | Prevents the cake from sticking to the tins. |
| Brown rice flour (for dusting) | As needed | Creates a non‑stick surface inside the tins; excess is knocked out to avoid a gritty texture. |
| Filling & decorations of your choice | – | The canvas for your creativity—think whipped cream, fresh berries, chocolate ganache, fondant, or edible flowers. |
Pro tip: If you can’t find glycerine at your local grocery store, a small amount of honey or a tablespoon of corn syrup can serve as a moisture‑locking substitute, though the texture may be slightly different.
Step‑by‑Step Instructions
Follow these numbered steps exactly as written. The method is deliberately concise, but we’ll add helpful hints after each step to ensure success, especially for those new to gluten‑free baking.
- Preheat & Prepare Tins
-
Heat the oven to 180 °C / 350 °F / Gas mark 4.
-
Grease two 23 cm (9‑inch) round cake tins thoroughly with butter.
-
Dust the greased tins with brown rice flour, then knock out the excess flour.
Why this matters: Even coating prevents the delicate sponge from tearing when you remove it later. The flour dusting adds a thin barrier that helps the batter rise evenly.
- Create the Base Batter
-
Place the softened butter and condensed milk in a mixing bowl and mix until smooth.
-
Add the potato starch, brown rice flour, and the beaten eggs; stir well.
-
Next, incorporate the gluten‑free baking powder, vanilla extract, glycerine, olive oil, and 3 tbsp of warm water.
-
Mix with an electric whisk (or hand whisk) until the batter is glossy and free of lumps.
Tips:
-
Scrape the sides of the bowl frequently to ensure all dry ingredients are fully incorporated.
-
Whisk on medium speed for about 1‑2 minutes; over‑whisking can cause the batter to become too airy, which may collapse during baking.
- Bake the Sponge
-
Spoon or pour the batter evenly into the prepared tins, smoothing the tops with a spatula.
-
Bake for 25‑30 minutes, or until the cakes are well risen and lightly browned on top.
Testing for doneness: Insert a skewer or toothpick into the centre; it should come out clean or with just a few moist crumbs. The edges will pull slightly away from the tin when the cake is ready.
- Cool & Assemble
-
Once baked, leave the cakes to cool in the tins for about 10 minutes.
-
After cooling, remove the cakes from the tins and place them on a wire rack to finish cooling completely.
-
When fully cooled, sandwich the two layers together with your favorite filling, then decorate as desired.
Final touches:
-
For a smooth finish, apply a thin “crumb coat” of frosting, chill for 15 minutes, then add the final layer of frosting or ganache.
-
If you’re using a heavy filling (e.g., chocolate mousse), chill the assembled cake for 30 minutes before adding delicate decorations to keep everything stable.
Serving Suggestions & Variations
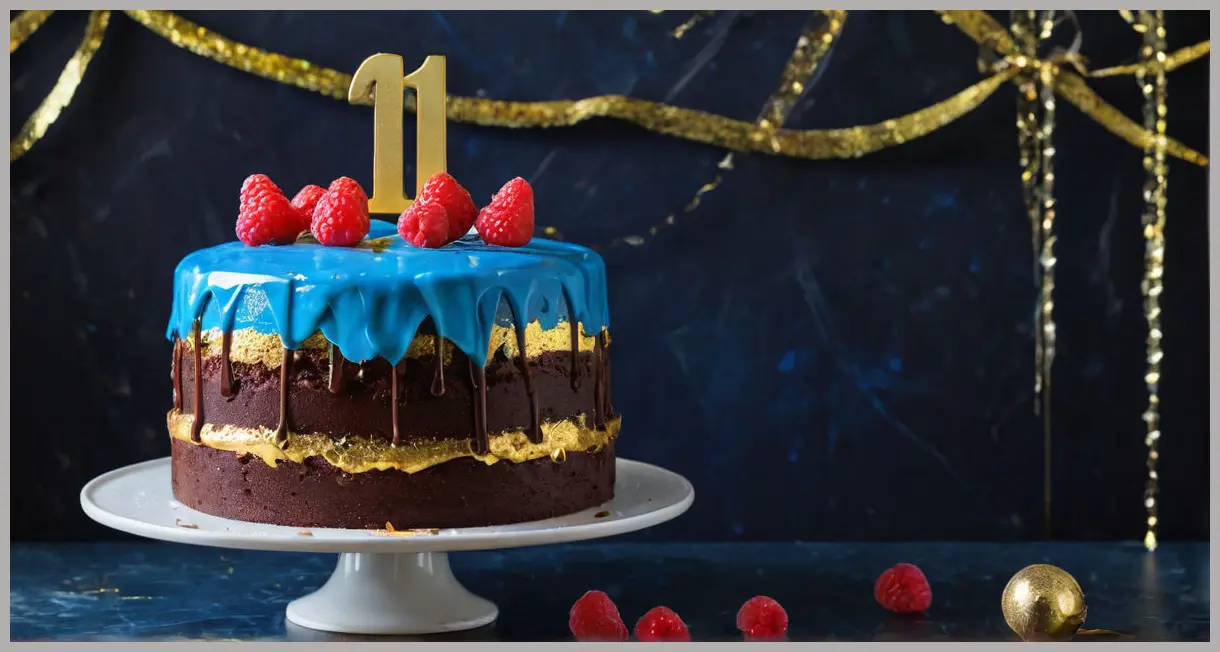
Even though the Gluten‑Free Birthday Cake Sponge is already a crowd‑pleaser, you can elevate the experience with a few thoughtful twists. Below are several ideas that cater to different taste preferences, dietary needs, and aesthetic themes.
1. Classic Vanilla Buttercream
- Filling: Whip together 200 g unsalted butter, 400 g powdered sugar, 2 tsp vanilla extract, and a pinch of salt.
- Decoration: Pipe rosettes around the edges and add pastel-colored sprinkles for a traditional birthday look.
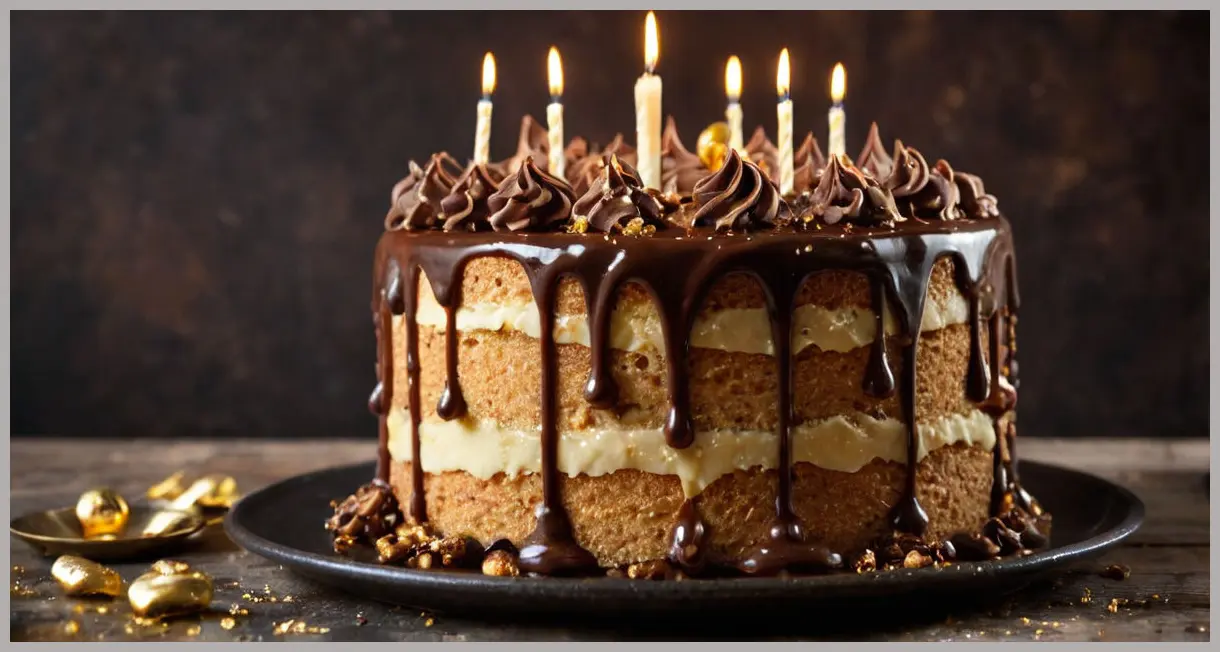
2. Chocolate‑Hazelnut Delight
- Filling: Mix 150 g Nutella with 100 g whipped cream for a silky mousse.
- Decoration: Shave dark chocolate over the top and scatter toasted hazelnuts for crunch.
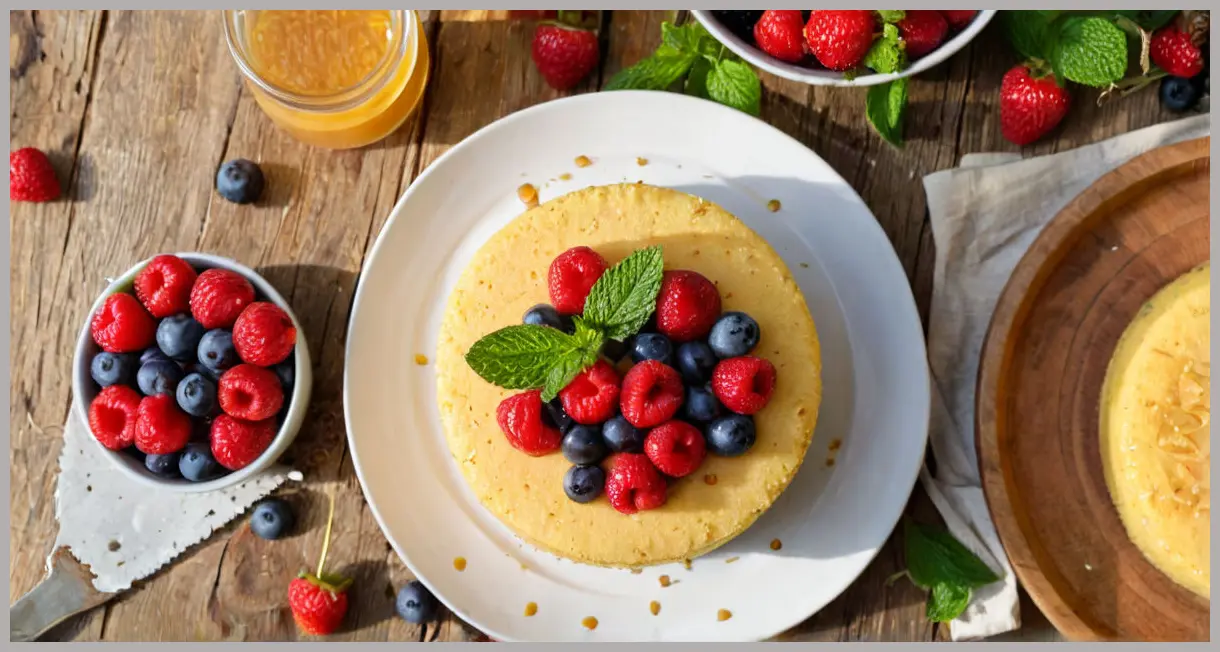
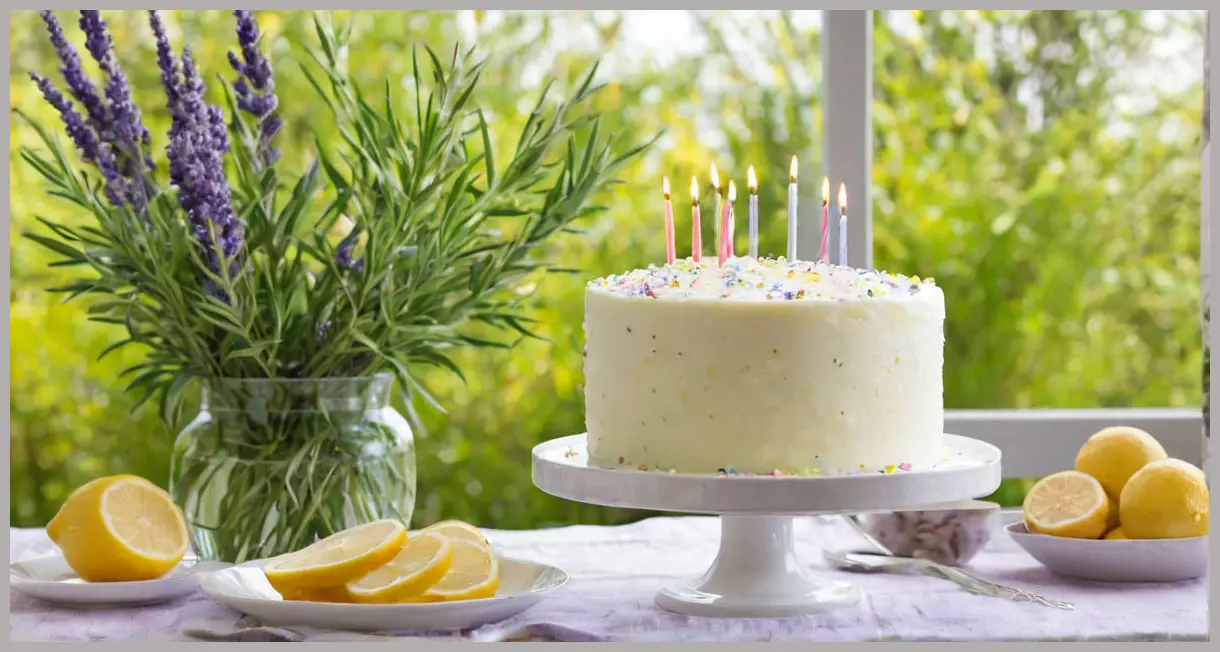
3. Fresh Berry & Lemon Cream
- Filling: Combine 250 ml double‑cream, 2 tsp lemon zest, 2 tbsp lemon juice, and 80 g powdered sugar. Fold in fresh raspberries and blueberries.
- Decoration: Garnish with whole berries and a dusting of powdered sugar for a light, summery vibe.
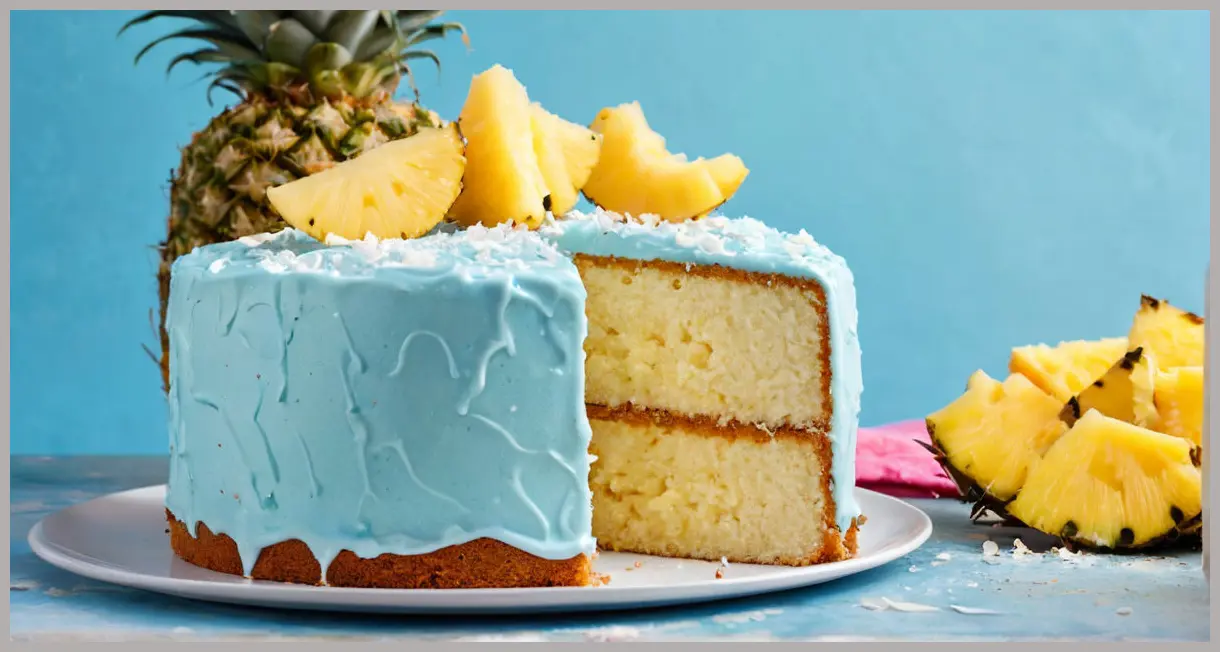
4. Coconut‑Pineapple Tropical Twist (Gluten‑Free & Dairy‑Free)
- Filling: Blend coconut cream with a splash of pineapple juice and a drizzle of agave syrup.
- Decoration: Top with toasted coconut flakes and thin pineapple ribbons.
5. Vegan Adaptation
- Butter Substitute: Use 225 g vegan butter or coconut oil.
- Egg Substitute: Replace the 4 eggs with 4 × ¼ cup of unsweetened applesauce or a commercial egg replacer.
- Filling: Opt for a dairy‑free chocolate ganache made with dark chocolate and coconut milk.
6. Mini Cake Pops for Party Favors
- Crumble leftover sponge, mix with a little frosting, roll into balls, dip in melted chocolate, and attach to sticks. Perfect for kids’ parties!
Presentation Tips
- Layer Height: If you prefer a taller cake, you can double the batter and use four 23 cm tins, then stack three layers.
- Texture Contrast: Add a thin layer of crunchy praline or caramelized nuts between the sponge and frosting for an added surprise.
- Color Play: Tint the frosting with natural food coloring (beet juice for pink, matcha powder for green) to match the birthday theme.
Conclusion
Creating a show‑stopping birthday cake doesn’t have to be intimidating, especially when you have a reliable recipe like the Gluten‑Free Birthday Cake Sponge at your fingertips. Its easy difficulty level, generous serving size, and short hands‑on time make it perfect for beginner‑to‑intermediate cooks who want to impress without the stress of complex techniques. By mastering the fundamentals—properly greasing the tins, achieving a smooth batter, and timing the bake—you’ll consistently produce a moist, fluffy sponge that serves as a versatile canvas for any filling or decoration.
Remember, the true magic lies in personalization: experiment with flavors, textures, and designs that reflect the birthday honoree’s personality. Whether you keep it classic with vanilla buttercream or go bold with tropical coconut‑pineapple layers, this gluten‑free sponge will hold up beautifully and keep everyone smiling.
So preheat that oven, gather your ingredients, and let the Gluten‑Free Birthday Cake Sponge become the centerpiece of your next celebration. Happy baking, and may every slice be a sweet memory!

Leave a Reply